

/image%2F2671538%2F20210419%2Fob_819872_img-0313.JPG)
Cat-shaped "minciunele"
Hello, world!
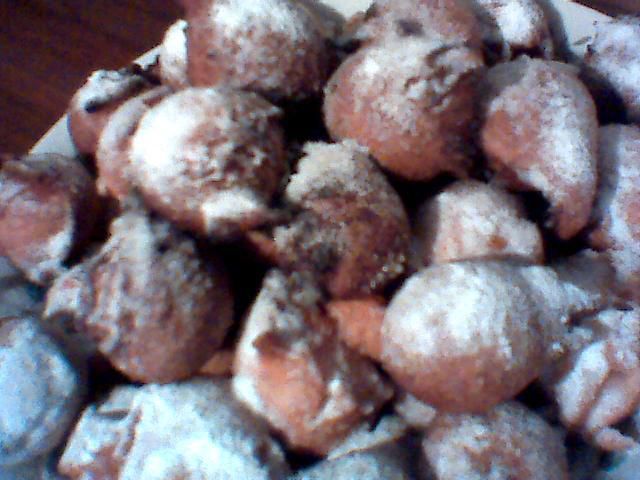
Today I'll share with you my results trying to make a common Romanian dessert, called "minciunele." This word means little lies and they're a type of donuts.
As you can see from the pictures, this recipe was supposed to appear quite some time ago. In fact, i had already posted this recipe on my first blog, before i rebranded for the first time.
When I first started blogging, I thought i'd have a cooking blog and another blog for other stuff. As we all know, things changed, and now i have this "general" blog and my site/blog dedicated to reviews, called Being Obscure, hosted by WordPress.
/image%2F2671538%2F20210531%2Fob_f1adb6_tumblr-p8bffs13v81u8vlf0o1-540.jpg)
The recipe goes something like this, and you can see the original recipe and results here. This is the blog dedicated to recipes for Romanian foods. The post shows you how these are supposed to look like, and you can clearly see my cats don't look as nice as the original.
If you want to know why i chose to shape my donuts as cats, I'll add the story AFTER the recipe. I recently realized people don't appreciate too much talking BEFORE the recipe. So, without further ado, here we go!
- 500 g flour (1lb?)
- 2 eggs
- 2 yolks
- 2 tablespoons of sour cream
- 1 teaspoon of baking powder
- some powdered sugar for coating
- some sunflower oil for frying; whatever other type of oil you use for frying food should also work.
- Beat the egg whites until they're fluffy.
- Mix the egg yolks with the sour cream and gently fold this mix into the egg whites.
- Sieve the flour and the baking powder on top of the mix.
- Gently fold these also into the mixture above, until you have a smooth dough.
The original recipe doesn't say to let the dough rest and raise a bit, so I didn't do that. However, I think it should be done, and i think it should be at least 30 minutes.
Roll the dough onto a sheet on the work table (about 5 mm or 2/8in thick) and cut your shapes. Of course, you can cut whatever shapes you want - i also did that.
To cut shapes you can use cookie cutters, a glass, or directly a knife. The difference is that with the knife things will be easier and much faster, while with the cookie cutters/glass you'll need to reroll the dough. You don't want to waste all that yumminess. ;)
/image%2F2671538%2F20210531%2Fob_b53699_tumblr-p8bffs13v81u8vlf0o4-540.jpg)
Fry your shapes in hot oil, over medium heat, and on both sides. If you have too many donuts and you run low on oil, add some more oil, and make sure it gets hot before you fry more donuts.
When they're brown on both sides, remove them and place them on a plate or a bowl covered with some paper towel or (unscented, dry) paper handkerhiefs. The paper will absorb the excess oil.
/image%2F2671538%2F20210601%2Fob_fce9d1_tumblr-p8bffs13v81u8vlf0o3-540.jpg)
In the picture above, you can see I'm frying donuts in other shapes than cats.
Once you're done frying all the dough, sprinkle some confectioner's sugar on top. These are always better with some of that on top.
I never tried, but these could also be good with some chocolate or cream on top.
/image%2F2671538%2F20210601%2Fob_b57e27_tumblr-p8bffs13v81u8vlf0o5-540.jpg)
Bon Appétit! Enjoy!
I believe that at some point in 2017, the butter we usually buy came with a little cutter. There were 3 shapes: cat, car, and i forgot what else. They were meant to help mothers make cute sandwiches for their kids, to entice them to eat and enjoy the food more.
I got the butter that had the cat-shaped cutter. I never really used it since, but one day, when i made these donuts, Anna jokingly challenged me to make them look like cats, thinking it would be impossible for me to do so.
/image%2F2671538%2F20210601%2Fob_c552b3_tumblr-p8bffs13v81u8vlf0o2-540.jpg)
The expression on her face when i pulled out the cat-shaped cookie cutter? PRICELESS!
So, this is how you make another type of easy doughnuts. i hope you liked the story about the cookie-cutter shaped like a cat as well.
As a reference, i have 2 more cutters for cookies: one shaped like spectacles and another shaped like lips. These are from H&M Home. I got them on sale, i think right before the SHTF last year.
/image%2F2671538%2F20210601%2Fob_507e46_a951d5f36530bf557c472dc68be01612ffaae1.jpg)
The yellow disk is a cookie or cake decorator i found in the lid of a jar of Nutella. I forgot the year. maybe 2019.
See you next time!
© Charly Cross 2013 - present. All rights reserved.


/image%2F2671538%2F20201122%2Fob_56f0c1_5439dd1206a76b793269566eaac776dd125113.jpg)


/image%2F2671538%2F20201122%2Fob_db1b57_dc988f93e0ad78f8a0383abb045c5f879de409.jpg)

/image%2F2671538%2F20201122%2Fob_95625c_e1892b5302d0f225cd90e364f7cea61660a3b2.jpg)
/image%2F2671538%2F20201122%2Fob_186e61_393fabce925fa04cf7e0599f59a9b38d654540.jpg)
/image%2F2671538%2F20201122%2Fob_2f8974_14c4acee6c024a0c708cdb5737c2d6f15a3adb.jpg)
/image%2F2671538%2F20180226%2Fob_f9c4d6_charly.png)