Overblog
Suivre ce blog Administration + Créer mon blog

tricks

Why aren't all single-use plastic bags banned?

Publié le par Charly C.

Hello everyone!

A few months ago I came across a post on Instagram, that made me think of this issue. I'll share the post with you later, in a different entry. 

Well, i thought about it before, but I somehow didn't have the right muse around me to write about it. I think the time is better now. 

Many types and shapes of plastic

I won't dive into what plastic is made of. We all know there are many different types and forms of plastic out there, and i believe this wiki page is only an opener for a whole can of worms on the topic.

Here, in the images below, you can see some types and shapes plastic can take:

  • the hard shell of a mouse and of a regular pen
  • the soft-cover protecting the wires of a mouse, 
  • the faux-leather cover of an agenda (that i use as a planner AND mousepad),
  • my home-pants made of 100% polyester that you get a small snippet of as well (flowery blue, in the lowest part of the image) 
  • a pencil - the green one (the blue pencil is made of the traditional wood)

In these images, most of the mentioned plastics can be used just once. Granted, they can be used for a VERY long period of time. I have to find a recycling program for the mouse, and I'll most likely keep the agenda -as I recorded some memories in it as well. 

The plastic pencil is both useful (when writing or drawing) and wasteful (when sharpening), but it has just 1 life as well. When it becomes too short to still sharpen/write with, I'll have to somehow discard it. 

I got the pants as already worn, but they were still in a good shape. When I'll be done wearing them, I can turn them into something else, until the fabric can no longer be used. 

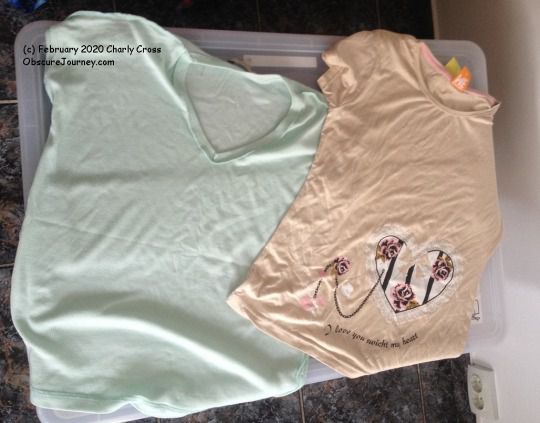
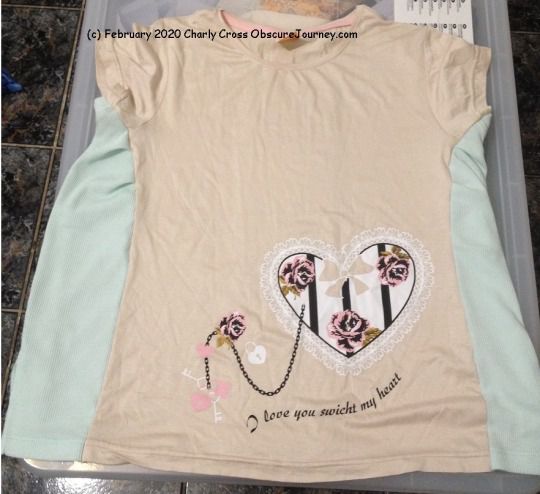
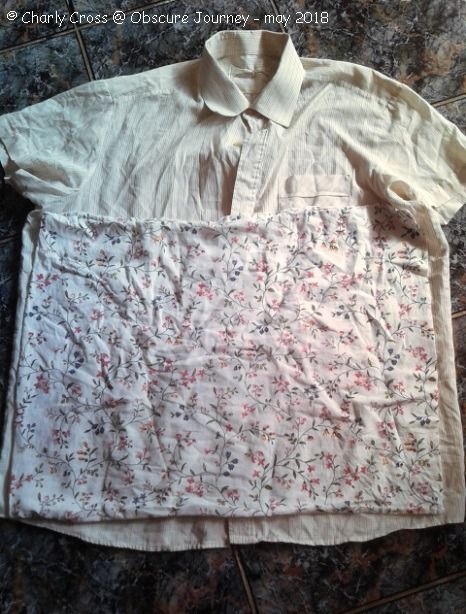
Speaking of clothes, I have 2 more types of plastics to show you. Well, one is a repeat, while the other is not. 

The vest is made of faux-fur and the coat of faux leather and has a polyester lining. These items too, can be used for an extended period of time. Additionally, they can somehow be reused when they can no longer be used as clothes. 

So, overall, this type of plastic is a tiny bit less problematic.  

Soo ... single-use plastic bags?

I'm not sure where in the world you live, and what the situation is with single-use plastic bags over there. In Romania, these are seen everywhere, especially when you go do your groceries. just look here:

This is a typical plastic shopping bag. It used to be free of charge, now it costs a few cents, depending on the store. They say this bag is single-use. Well, it is not really, unless it breaks. 

I often reuse these when shopping and sometimes as trash bags, when they become a bit too worn out. This particular bag is filled with other plastic bags, and many households across the country have a big plastic bag filled with other (smaller) plastic bags.  

The irony is that most single-use plastic shopping bags of certain compositions have been banned. They have been replaced with "bio" single-use plastic bags. I'll show you one below:

This bag is for fruits and vegetables. it's very soft to the touch, breaks easily, and I'm not 100% sure, but i think it disintegrates quite rapidly once it gets punctured. Currently, shopping bags are very similar to the touch to this 'bio' bag. I still re-use these for lightweight trash, if they didn't already break. 

I made 1 bag for fruits and vegetables, but as you can expect, I forget to bring it with me when shopping. And it's not even guaranteed I'll buy such goods. 

Now, the biggest offenders

I'm not even done, because these previous items can be re-used or have prolonged use if you care to spend less and have a creative spirit. 

Now, I'll show you the biggest offenders of plastic products. 

Cling film!

Cling film is indeed a pretty decent invention for covering foods when putting them in the fridge, or for the sandwiches you make for your lunch break. It probably has other uses that I'm not aware of. 

Regardless, this item should be banned! Or people should stop buying this product altogether! It can be replaced with at least 3 other items:

  1. casseroles with lids: These can be used to store food in the fridge and to take your lunch in. These can easily be washed and reused. I wouldn't recommend the ones made of hard plastic, but it's not very convenient to carry glass stuff around. Maybe metal containers can do the trick here, but I'm not sure they still exist. 
  2. lids or plates used as lids: These can be used only in the fridge. These are more accessible to those who don't always have a fridge full, and they can occupy more space. 
  3. zip-lock bags: Yes, they're still plastic, not great, but if we carefully handle these, they can serve for a long(er) period of time compared to cling film. 
Plastic bottles!

This bottle held apple cider vinegar. When you walk into any store, you'll see hundreds if not thousands of plastic bottles: for beer, oil, sodas, milk, laundry and dish wash, and on and on. 

These are BIG one-time plastic use offenders. Granted, some of these products cannot be sold in a different type of container. 

I think that all stores should request buyers to come with the old/empty bottles when buying a new product of the same type (regardless of brand), or else be forced to pay more. The empty bottles should be collected and recycled. 

I know some people re-use plastic bottles for various things, mostly instead of a traditional pot for plants. This is great, but not everyone has a green thumb or is creative enough. 

Packaging!

There are SO many items packaged in plastic! Above you can see a bag of frozen mixed vegetables and 3 small containers (I'm not sure what to call them), for milk for coffee. 

The bag above is a single-use bag that should be banned. it's too small to be reused and breaks quite easily when not careful. The only re-use i can think of is for the above-mentioned lunch if it comes as a sandwich. I must admit, I'm not sure what can it be replaced by, and therefore it can be spared for some time. 

Trash bags!

I saved the worst for last and i don't even know what to say here. We literally buy these bags to throw them away! Make this make sense because it doesn't make any sense to me!  

As far as i saw here, these rarely have a 'bio' version. And even then, they're way more expensive than 'regular' trash bags. It's also not a guarantee those 'bio' bags last for less time in nature. 

P.S.! 

I know there are also single-use plastic plates, glasses, straws, and cutlery, however, i don't own any such items anymore. Precisely because of their single-use attribute. Additionally, it's not healthy to eat out of re-usable plastic plates either - plastic can leech into the food. This is akin to slow poisoning.  

I don't think paper is a good alternative to plastic, especially not the plastic/paper combo we see on some products. We need to cut trees to make paper, and we need trees to breathe cleaner air. Also, many animals rely on trees to survive. 

I think that paper could be recycled easier than plastic and it decomposes faster when left out in the open. Maybe we could make packaging out of bamboo instead? 

I didn't watermark these pics as I didn't see the need to, but they were taken by me in june/july of this year (2021).

See you next time! 

©Charly Cross 2013 - present. All rights reserved.
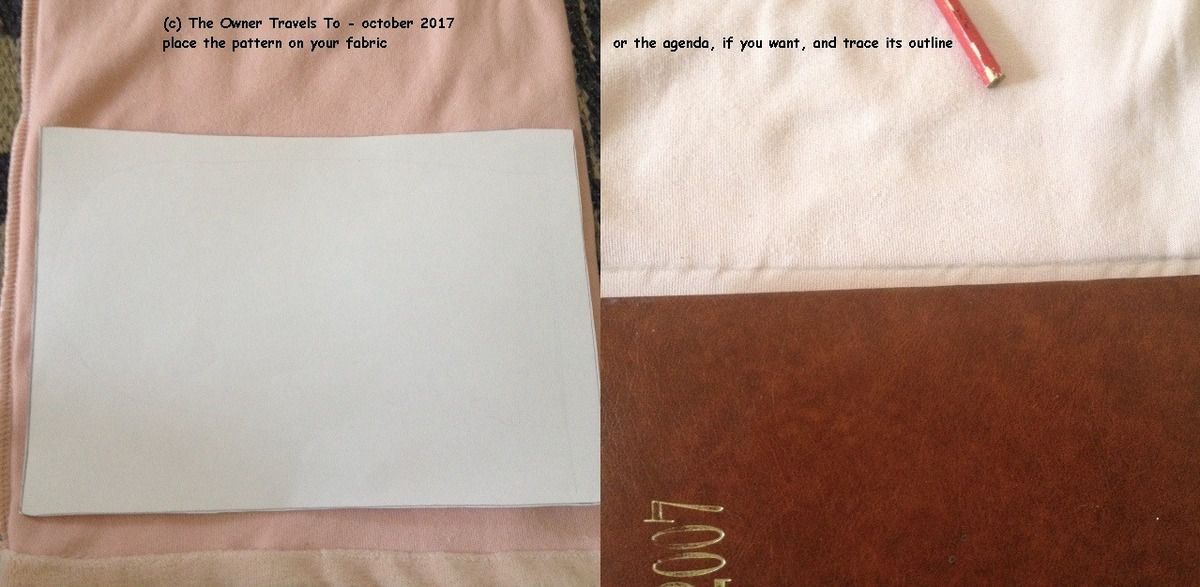
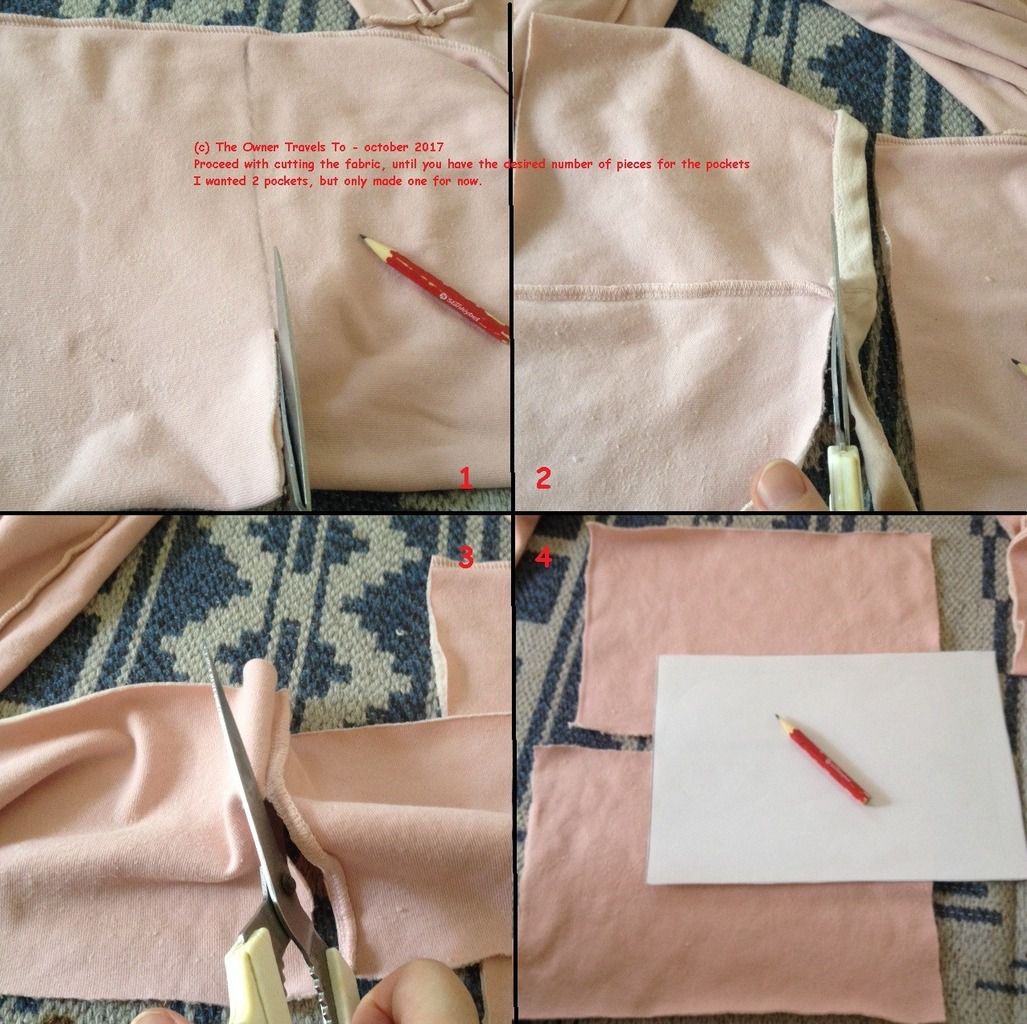
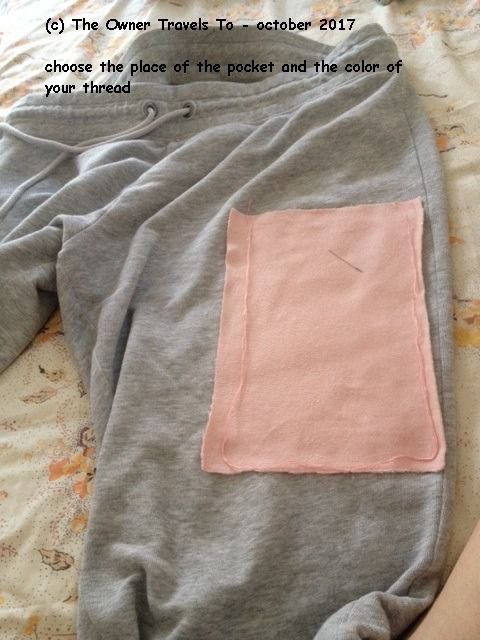
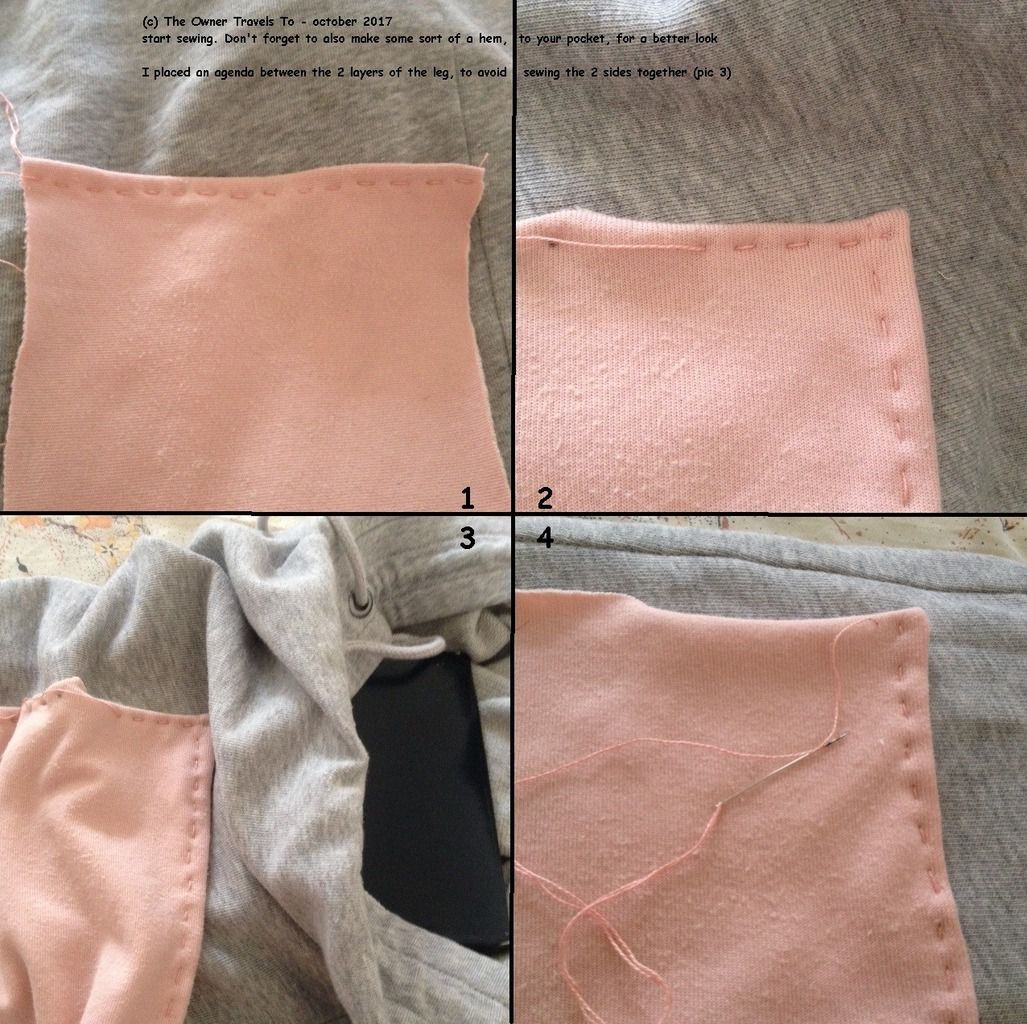
Voir les commentaires

Making Victorian-inspired pantaloons - Sewing with a vintage Burda

Publié le par Charly C.

Hello.

In November I had some time to make something and to even finish it. YAY!

Disclaimer: Well, I'm not sure they're really called "pantaloons" but this is what I'll call them in this article. I say they're Victorian-inspired because they have frills and lace. 

INSPIRATION

My inspiration came from 2 places if I can call them that. 

The first place is Subeta's (that is a referral link to this online pet and dress-up game) Magical Pirate Pantaloons of Sweet Love - you can see them here (This is a fan-made and helpful site for those playing Subeta).

The above image belongs to Subeta - used for informational purposes.

The second place is Bernadette Banner's video in which she makes a pair of Victorian underwear or combinations. You can watch the video here. She uses historically accurate fabrics and methods, including or especially hand-sewing. 

The end result is closer to the Pantaloons of Sweet Love mentioned above, as you'll see from the pictures. 

WHAT DID I USE

Fabric: As for fabric, I used some blue and very thin polyester fabric I had. Despite it being polyester, it feels quite nice against the skin. 

Pattern: For the pattern, I had nothing "historical" or something made for a (Halloween) costume. I had this May 1996 Burda magazine that had a pattern I could use. 

I needed some loose trousers with the simplest pattern possible. This one had just 2 pieces and was very loose. What else can I ask for?!

Other supplies: a pair of shears, matching thread, sewing machine, some elastic (not included in the picture), hand-made lace, and chord that i just had on hand. The lace and chord were either given to me or i may have found them at the trash

The white lace is the remaining piece from what i had. Because it didn't occur to me to take pictures BEFORE i use it. Click here to see a close-up of the lace and the chord thing. 

WHAT DID I DO

As you could imagine, first I had to trace out my pattern pieces and to cut the fabric. As a matter of fact, i wanted to make these Burda trousers for Anna, a while back. So i had the pattern already traced out and cut. 

I only needed to cut the fabric. I folded the fabric in half, placed the paper on it, and cut with no seam allowance. This design is quite loose, therefore cutting with no seam allowance is fine. Otherwise, Burda patterns require you to add 1 cm (about half an inch?) of the seam allowance. 

The next step was to sew 1 front piece to a back piece, then to sew the crotch. And at this point, you have a pair of trousers. I made a channel for the elastic at the waist, out of the pants - the design has a quite long crotch area, and therefore, you have plenty of fabric to just roll the top inwards twice for this purpose.  

As you can see, my seam allowance is pretty small, but enough.

You can use elastic or a chord. This depends on whether you just want to pull the pants on or you want to bother to knot the chord, as the line drawing suggests. For me, the elastic was just SO easy! 

And now comes the part where i made my first mistake which made things a bit more difficult for me. I constructed the trousers BEFORE i added the lace or formed those ruffles or channel for the knee elastic.  

If you ever sew something, you would know it's easier to put ruffles on something when the item is flat/2D and not in a 3D shape. I think i would have been more accurate as well. 

My next steps were as follows:

I measured about the place where i want the elastic to be, made the channel for it, eyeballed the place of the first ruffle, eyeballed the location of the hem, and completed the first leg. 

I assumed that finishing 1 leg and then doing the second one would be easier. I'm not sure if it was or not, but it did feel that way.  

Another mistake was not to measure the white lace, to ensure i have enough. From my eyeballing, it looked as if i did have enough. By now, you already know my guess was correct.

However, while I was working on the project, i had my doubts when time came for me to complete the second leg. I suggest you measure everything ahead of time, unless you trust your eyeballing guess. I'm pretty good at guessing, and this is why i didn't do the sensible thing of measuring. But I shall in the future. 

Once the ruffles and the lace were installed, the pantaloons were done! YAY! Now (as I type this), they're packed and hidden, as they're a gift for Anna. You'll be reading this after she gets her present, sorry. 


Previous Experience

What i want to also mention is that i actually worked with this pattern once before. 

I made a pair of trousers for myself, last year in October. Back then, i used this pinkish silk fabric, that only later i realized it could be silk and i nearly fainted. I was either brave or decided to just go for it, and make myself some trousers. 

That being said, this is how my pair turned out. There are many mistakes to be seen up-close. From further away, you can't tell. 

For Anna, I used size 36 -the smallest available and for myself size 44, the largest available. I chose the sizes based on our measurements, but i didn't measure the pattern pieces themselves to see how large the finished garment would be. 

For my pair, i tried leaving 1 cm of the seam allowance. My pair is a bit too roomy. It's because of this previous experience with the pattern that i knew not to cut with a seam allowance this time around. 

As you can see, the expectation VS reality hits again, hahaha. Don't ask about what i'm wearing - at the time i thought it looked OK. The top is also hand/home-made, but it's a hand-me-down, so i don't know the pattern nor fabric. 

Yes, sadly, the picture with me is not complete, therefore you can't see these pants are a tiny bit short on me. But this is because I'm taller than most and the pattern is for regular-height persons. 

© Charly Cross 2013 - present. All rights reserved.

Voir les commentaires

How To Enlarge a Tshirt - DIY, Upcycling, Color-blocking

Publié le par Charly C.

Hello!

Today I have a solution for old clothes that don't fit anymore, and thus they sit in the closet, collecting dust. This solution will save your wallet, give a new life to both your clothes and wardrobe, and create a unique personal style, because YOU ARE unique!  

Most clothes that we buy come in standard sizes. They assume that if your hips measure 100cm, then perhaps your waist is around 80 or 90 cm. This is not always the case. they make clothes in standard proportion, but our bodies are not always proportionate. 

My body for instance, is as much as an hourglass as it can, hence there's a significant difference between my waist and bust, and waist and hips. However, if it wasn't for my chest, i could fit into tops that are sized Small because my rib cage is pretty small. 

So, back to topic. I had these 2 tshirts you can see below, but i can't wear them. The light green one is too transparent for my tastes :( The other one was extremely tight. 

How To Enlarge a Tshirt - DIY, Upcycling, Color-blocking

I liked the beige one more than the greenish one, so i wanted to wear that one But i had to be larger.

I measured it against a tshirt with a fit that I liked. In my case, i needed about 32cm more fabric.

The idea was to find strips of fabric that were 16cm wide, cut the side seam on the beige tshirt, and attach the strips to the new edges. 

This is where the greenish tshirt came in handy. It provided it side seam, already had hems, and was a very similar fabric to the other one. At least in weight -very light weight, and feel - very soft and comfortable, breathable. 

I measured, marked, cut and proceeded to sew. the pieces in. I measured 8cm on each side of the greenish top. Since it's already folded, 8x2=16, 16x2=32. 

I think i should have used straight strips of fabric, and not the seam sides of another tshirt with a different cut. It turns out, the greenish fabric was somehow loner than the beige tshirt. I had to create some pleats, to make them match. 

How To Enlarge a Tshirt - DIY, Upcycling, Color-blocking

When laid flat, the new tshirt looks off, but on me, it looks ok. 

So, to make it easier, the steps are:

1. find out how much room you need - measure your top and measure your body, and see the difference. OR, measure the smaller top against another one that fits good. substract the smaller from the bigger, and that's how much fabric you need (it's width). 

2. the easiest method would be to insert strips at the side seams. divide the width from above by 2, since there are 2 side seams in a top - the ones going from the armpits down to the waist and to the elbow/wrist. 

3. find a similar weight fabric or texture, and cut 2 strips equal in width - the value from point 2. Add some extra for seam allowance. Ideally, these strips would be the same length as your top, but feel free to be creative here. Don't forget about the hem on the lower part and at the sleeve, so they might need to be longer than your top. 

4. cut the side seams of your tshirt. 

5. sew the strips of fabric to the open edges of your top. And you're done!

© Charly Cross 2013 - present. All rights reserved.

Voir les commentaires

Changing a jacket' sleeves

Publié le par Charly C.

Hello all! 

I had a thin Zara jacket with faux leather sleeves. I bought it several years back during the summer sales, if I'm not mistaken. But as it goes, faux leather started peeling and I don't like that. I don't know who likes peeling leatherette, to be honest.  So, I thought to myself that I won't be wearing the jacket anymore though I could try to change its sleeves now that I have some good fabric shears and a decent sewing machine. I also have a few books that teach how to make sleeves and attach them to the garment. The only downside was that I would be ruining the pretty (and very cheap) fabric A got me (from a second hand store. It was there because someone cut it twice on bias, and it probably wasn't enough for their project.) 

So, my thoughts were:

  • I wanted to make something with the fabric
  • I HAD to use it (the fabric) in the end, somehow
  • the fabric was cheap - about $1 for a yard or so? I didn't measure it, sadly. 
  • I wasn't going to wear the jacket anymore
  • I would be learning something
  • I received encouragement to "just go for it!"

I don't think I needed more excuses. So I started with ripping the seams apart because I wanted to use the existing sleeve as pattern for the new sleeve. 

  • the sizing was the right one, especially the arm-hole
  • the length was ok - i could always cut a few extra cm if needed, which I did anyway.
  • I wasn't in the mood to learn how to make a sleeve pattern from scratch. That day will come, but it wasn't this day. 

Sadly, I don't have pictures for all the steps :( I thought of taking pictures when it was too late. Some steps don't even need pictures because anyone can do those with the right tool.

the process

I started by removing the sleeves from the body of the jacket using the seam ripper. My sleeves also had zippers, so I also removed those after. 

Once I had my sleeves, I took one and I placed it flat on some newspaper to make a sleeve pattern, so I can cut the new sleeve from some fabric. I placed the fabric folded over.  When I cut the fabric, I included more seam allowance vertically, but not for the width. 

I didn' like what the fabric felt against the skin, as I knew I would wear this jacket over a tshirt as well. This meant I had to find some fabric to make a lining. The fabric I found is brown and ugly, but serves the purpose just fine. 

You can't really tell from the picture, but first I sew the sleeve to the lining (former sleep wear i believe) at the wrist-end. I then pinned down the sleeve to the rest of the fabric, and then I cut the lining. (note 1)

I also sew the lining to the tartan, before assembling the sleeve together. I figured that shiny and slippery fabric would be difficult to work with if it's not attached. I also ran a zig-zag stitch. (note 2)

Originally, the previous sleeves did have lining as well. I couldn't use it though. The seam allowance was fraying badly. Additionally it was shorter, because the leatherette was folded over some, like the sleeves on suits and coats. 

As I said, I wasn't going to learn how to make such sleeves. This means that the brown lining can be seen at the wrist level, on my sleeves. It also looked ugly. I decided to run a top stitch to see if it looks any better, and it did! See the picture below.

If you do a sleeve like I did here, I highly recommend you do the same. In my opinion, the piece looks 'done more professionally.' You can do this top stitch AFTER sewing the sleeve, so that  the seams would lay flat against your wrist, and rub less. If I ever do this again, I'll know what I need to improve :)

 After my sleeves were complete, it was time I attached them to the body of the jacket. The sleeves I made were a bit larger than the arm holes of the jacket. I started pinning the sleeves starting at the armpit seams going to the top. At the shoulder part, I needed to create 2 pleats. Gathering the fabric is an option, but not for this lined tartan. The pleats give the sleeves a more structured, put-together, "professionally done" look, in my opinion.

And this is the final result! What do you think? 

extra step

However, before attaching the sleeves, I decided I wanted some lining for the back part of the jacket as well. I used the same ugly brown one as for the sleeves. The jacket is very thin, and the spring was cold this year. I wanted some protection from the wind, and the lining would provide just that. 

I used the back of the jacket to serve as guide for a pattern, drew it on paper, cut the brown fabric, and sew it onto the seams of the jacket. I don't have more pictures, sorry. :( 

 That's about it! Don't skip reading the notes below to learn what I wish I did differently.

See you soon! 

Note 1: The funny thing is that while I tried to sew the right side of the tartan fabric to the lining, i only managed with one sleeve. The other one, the tartan is on the wrong-side. I obviously saw too late. I didn't and won't go back to fix it. 

Note 2: I wish I assembled the tartan first into a sleeve, then the lining, and then attach the tartan to the lining at the wrist. I thought of this too late. 

Note 3: This project is from April 2019. I didn't get to watermark the images. Now with my arm in a cast, doing so is more difficult. 

© Charly Cross 2013 - present. All rights reserved.

Voir les commentaires

Forgotten knowledge from my granny - by A

Publié le par Charly C.

This entry is written by A. She shares valuable life lessons and common sense tips she learned from her (now deceased) grandmother. I think these tips are a must know for everyone these days, no matter where you live or who you are. 

This entry is a bit overdue, but the tips can still be applied. A second part might follow at some point in the future.


The cold season is also the season of the flu, and every year different strains show up. Of course, you can catch the flu or the common cold at any time. So, I wanted to talk to you a little bit about how my family dealt with issues like this in the past and to be honest never got sick. 


When I was a kid, my grandma used to be really careful with me so I wouldn't sick. There were times when I lived with her, my mom, dad, aunt - and sometimes other people would also show up. My grandma always made sure to separate every single dish, kitchen tool, and ask the sick person to wear a mask if it applied. 


Every dish was washed right away, boiled - which is really important when trying to get rid of germs - and the healthy people in the family were not allowed to use the same ones as the sick person. (We didn't have dish washers back then, and they're not popular even now.


Physical closeness also wasn’t permitted. No hugs,  no kisses, no nothing - you simply had to stay away from the sick person for as long as they were contagious. 


These things really helped and as a result,  my mother's sister and all the other family members didn’t get hepatitis when my mom got it. Of course, every disease requires different rules... 


Every time I would get a stomach upset I was put on a 24-hour liquid fasting period, after which toast, boiled potato and carrots were introduced gradually.


So, I would get well a lot faster than my friends and other people who usually suffered for days while still eating their usual diet. This is because the stomach truly needs rest when sick, and allowing it that time results in a much more speedy recovery. I’m still following these tips up to this day, or try to.

That was it for now.

Credits: 

text: © Charly Cross (2013 - present) and A. All rights reserved.

pictures: are from a book called Florals and Nature - Memories of a Lifetime, published in 2005, ISBN: 1-4027-1998-1, and they're free to use for any type of project. Read more (or buy) here. (Not an affiliate link. Not a sponsored post.)

Voir les commentaires

I embroidered my jeans jacket

Publié le par Charly C.

As you already know I like doing things with my hands. I like coloring, or I like "improving" my clothes like I did these pants

The jacket I decided to embroider is off white, and from H&M, but from at least 2 years back. I doubt you'll still find it - when i bought it, it was sales season. I also haven't seen anything similar anymore. This jacket is pretty long, as it reaches below my butt. Its fabric also feels sturdy, and doesn't really let the wind through. I wish it had a hoodie - maybe I can MAKE one in the future? LOL. 

So the jacket has 4 large pockets on the front. The 2 on the chest have a flap, while the ones on the lower part have a bit of a different shape. I thought the jacket looks too plain and that I needed to do something to cheer it up, give it a bit of a fresh air. What better way to do this if not with some embroidery? And not just any type of embroidery, but specifically Romanian.

I embroidered my jeans jacket

So i searched for something in the book with Romanian embroidery I own and I also searched online. And I found the above design, completely black, originating from the Moldova area. 

I can only remember finding it on a Romanian online book store, and they were showing pictures of a few pages from inside the books they had listed. And U copied the model on paper. 

I embroidered my jeans jacket

I had no idea to start to embroider the design. It looks easy enough, especially if only one color is used. Another problem was the fabric as it is woven, but it uses a special type of weaving that makes it hard to count the threads. And if there's one thing to know about Romanian embroidery, is that it counts the threads in order to make a pretty, even design.

I decided to put the paper on the pocket, and to proceed with sewing through the paper. I didn't want to break the paper, at first, but i really had no idea or indication anywhere, on how to do it. 

As you can tell from the image above, it worked pretty well. Except for when i was done,and i had to break the paper. Can you guess what happened? The thread was loose. If you'll look carefully at the next 2 pictures, you'll see what I mean.

I embroidered my jeans jacket

Since I already embroidered one pocket, I had a better idea on how to proceed with the design, on the next ones. I didn't take pictures, but I'll try my best to explain if you want to reproduce it - but please give credit to the Romanian people.

If you'll use a fabric on which counting the threads is easy, it's even better. You basically need a 20 * 20 grid, as there are 20 rows and 20 columns.

If you use 2 colors:

Start with any of the red squares, but not the middle one. You embroider 2 rows of 2 crosses, then jump to the design in the corner that would be above it, and embroider in the same direction. When done, jump to another square, then another corner, then another square, then the 3rd corner, another square, then the one in the middle, and then the last corner.

You'd have to turn the fabric almost with each jump from the corner to the square. A lot of turning would happen when working on the second color as well. 

If you look closely, you'll notice 2 rectangles that intersect one another. I found it easier to work on them if I stat with the longer section, then the edge, then the shorter section, then jump to the next longer section, and so on. 

   the final look :)

the final look :)

If you use a single color:

I suppose that for when embroidering in a single color, the design would be easier, since you'd have to work on rows. I didn't want to work it all in black because I thought it would look too austere in a way. 

As you can see, i managed to finish the embroidery. It was pretty easy too, once I got used to it. But of course I also cheated a little bit. With the design copied on a different paper, i poked holes with a pencil, to mark the fabric with a visual guide. 

I didn't cheat perfectly, as you can probably tell. The crosses are not all the same size and are not perfectly aligned either. It took me 4 days in total to complete, with just a few hours per day. I'm pretty happy with the design, i think it's cute and cheerful, and that it looks quite authentic. I have nothing to compare it to, so i'll just stop here.

See you guys!

© Charly Cross 2013 - present. All rights reserved.

Voir les commentaires

panic attack help

Publié le par Charly C.

Does someone have a panic attack? this is what you can do to help, and even make others like you.

Disclaimer: Pictures are not mine! I found them on Tumblr and i forgot their creator. I'm pretty sure they won't mind me sharing. 

panic attack help
panic attack help
panic attack help
panic attack help

Voir les commentaires

Roasting eggplant - vegan friendly!

Publié le par Charly C.

I have to post this, because for the first time I managed to roast eggplant in a way that worked, is healthy, and I actually enjoyed eating. Oh, and yea! It's vegan friendly

So i had these eggplants [aubergines] about to go bad. So wondered what to do with them. Roasting them sounded really good. Here is how I did it!

Roasting eggplant - vegan friendly!

Ingredients:

  • eggplants [as many as you like]
  • condiments [i used black pepper, basil, and thyme]
  • some salt
  • some cooking oil [unflavored is best]

I first washed and peeled the eggplants. Then I sliced them as evenly as i could - i'm really bad at this task. Their thickness was about 1cm - i didn't measure.

I realized that using a long-bladed knife helped a lot with this task. 

Roasting eggplant - vegan friendly!Roasting eggplant - vegan friendly!

I used the brush usually useful when baking, to lightly spread some oil on my baking pan. 

I realized that the baking pan is quite important - I had some non-stick types, but they burned by foods as they were too thin, and the non-stick coating peeled. 

The pan i used this time is thicker and rather shiny, but I can't tell what type it is, or what it's made of. All i know is that i can scrub it quite a lot and it won't peel. It's not really enamel either, or at least i don't think it is enamel. 

Roasting eggplant - vegan friendly!

After I sliced the eggplants, and after i had lightly oiled the pan, I placed as many slices of eggplant as i could in the pan. I then tried to smudge a bit of oil on each slice, and sprinkled with salt and the condiments, and then i put the pan in the preheated oven. 

I let the slices stay for some 25 to 30 minutes, and then i flipped them over. I proceeded to still let them cook for some 15-20 minutes. 

Unlike with the non-stick pans, the slices did NOT stick to this pan - they did stick to the non-stick ones when i tried the recipe before. I have no idea how it happened. All i know is that i got rid of the so called non-stick ones, but mostly because they started peeling.

Roasting eggplant - vegan friendly!

I cook with gas, hence fire, and this may be a reason for my previous attempts at roasting to turn into failures. Vegetables turned mushy, or burned. I guess this baking pan is specially made for cooking and roasting with gas. 

Bottom line is that if your roasts are not like the expectation, try to change your pan - it might just do the trick.

(c) Charly Cross 2013 - present. All rights reserved.

Voir les commentaires

DIY: shirt into pillow case

Publié le par Charly C.

This week is for another do-it-yourself project presentation. YAY?

Let's learn how to make this pillow case from a shirt! shall we? In the first pic I used a different shirt because i didn't think of the pics I'd use, ahead of time. Plus I realized a bit too late I could make a blog entry about this process, so not all the pics are with the same shirt. I hope it doesn't bother you much. 

from the shirt on the left to the pillow case on the right. from the shirt on the left to the pillow case on the right. from the shirt on the left to the pillow case on the right.

from the shirt on the left to the pillow case on the right.

There's a little backstory for this DIY, so let's start with that. If you're not interested in it, scroll down till you see the first picture. ;)

We received some pre-owned/pre-worn shirts because "they're still in a good condition, maybe they fit you and you can wear them!" As great as this sounds for a minimalist person or someone who's concerned about too much waste and poverty, the reality is that those shirts were obviously worn. 

The shirts were in decent condition, but they're yellow on the collars, the fabric is also a bit destroyed because they've been worn too much. Even washed, these garments are nowhere near to be worn again, not even indoors. See first picture, here below.


ewww, to gross to still wear >_<

ewww, to gross to still wear >_<

I didn't throw them away because I thought I could do something out of them. I first thought of cleaning rags, but the fabric is not quite the right type, but more of a bed sheet type. And then it hit me that I needed more pillow cases - stitching together pieces of fabric to make a sheet is too much even for me. 

Things I used: 

  • an existing pillow case
  • scissors
  • sewing needle and thread
  • clothes iron
  • measuring tape (not really used in the end) 
  • pencil 
  • extra needles


very old scissors, sewing thread and measuring tape. pencil type is below.

very old scissors, sewing thread and measuring tape. pencil type is below.

The first step is to make sure the garment doesn't have holes and clear of wrinkles, hence the clothes iron. If it has holes, either patch them up or give up the garment. My shirts don't have holes, so I checked to see if they're big enough to make a case. They're mostly men's shirts, so there's enough fabric - see below. 

making sure the shirt is big enough for a pillow case

making sure the shirt is big enough for a pillow case

If you align the old pillow case to one of the side sewings of the shirt you'll save yourself some time as you'll only have 3 more sides to sew together.  Make sure to turn the shirt inside out to have it ironed (not even designers work with wrinkled fabric), and buttoned up.

In my opinion, the bottom hem is the easiest to start with, especially if it's a straight one. But you could align the shoulders in place, pin the case to the shirt and start sewing all around it. 

I sew by hand, and this means I needed more visual guidelines and this is where the pencil proved useful as I drew around my pillow case, on the shirt. Depending on the type of lead, it will be really easy to draw on fabric. My pencil is a Staedtler norica 132 46 HB 2 if it's of any help. 

Sewing all sides with the pillow case still attached to the shirt will save you some time. This is especially true if you have a sewing machine [unlike me]. Well, it will save some time when sewing by hand as well.

DIY: shirt into pillow caseDIY: shirt into pillow case

Now supposedly you sew all the sides of the pillow case. It's time you cut all the excess fabric. Once all the extra fabric is removed, you will have something that looks a lot like a pillow case. See below how mine turned out. I must say I'm pretty proud of myself. 

I purposely left the buttons of the shirt on to save me time and effort. This way I don't have to sew other buttons, nor a zipper. The pillow case looks a bit old fashioned, but I find it really pretty. 

This was my first time completing such a project, and sewing it by hand along with having other projects going on, made this DIY unnecessarily long. I think that with a sewing machine this would be a 30 minutes (tops) project. 

DIY: shirt into pillow caseDIY: shirt into pillow case

Of course, I leave the project for 5 minutes, and I return to see this (below). If you have kids, cats, dogs, any other pets, make sure they don't have access to the needles if you need a short break from your sewing or whatever you're doing. You may know this, but while it looks cute in photos and in real life, such a situation can be dangerous - luckily my boy wasn't sitting on the one I was working on. 

sometimes cats happen

sometimes cats happen

PS: Sometimes, after you finish your first project, you may realize that placing the pillow case in a different position on the shirt, it could make your job even more easy. In my case, I placed the existing pillowcase in "landscape" position while the shirt was in "portrait" mode. Like this, I only had to sew 2 sides only, saving me even more time. See the pic below for a better understanding.

The resulting is not much different than the first one I made, so I didn't think another image would be needed. 

DIY: shirt into pillow case

 © Charly Cross 2013 - present. All rights reserved.

Voir les commentaires

Hacking my pants with a DIY pocket

Publié le par Charly Cross

While I have many other things to update you guys on, on Friday that just passed I was hit with a wave on inspiration and I thought I could write about the result, and show you the process of getting a similar look, if you'd like to.

Let's start with 2 things:

  1. pockets are useful and sometimes fun
  2. I have at least one clothing item with no pockets

Clearly, something had to be done, especially now that winter is coming. So I decided to hack my clothes by adding pockets to them. I started with some training pants - is this what they're called? - though, this must be one of the more difficult clothing items to start practicing with.

So these are my pants. Aren't they kinda plain and boring?

So these are my pants. Aren't they kinda plain and boring?

This is how they turned out!

This is how they turned out!

Not too shabby, if I can say so myself. My partner thinks the result is rather cute and not all that bad for the first ever DIY / hack project. There are a few steps to follow if you want a similar ... look, or result ... however you want to call it.

TOOLS:

  • clothes that need pockets
  • fabric to turn into pockets
  • scissors
  • thread and needle
  • pencil and eraser, maybe
  • paper [for your pattern]

HOW'S DONE, step by step: guaranteed 100% NOT foolproof

  • Choose a clothing item that could need some pockets - in my case, some HM sweat pants I got on sale, in summer or so.
  • Search for fabric that would look nice on the chosen clothing item. I used some old sweat pants by Juicy Couture, on baby pink [is this how the color is called?] Those pants were some 8 or 9 years old and were well loved and falling apart, but I still felt bad for just throwing them away and some parts were still in decent condition. hmmm
  • Make sure the fabric you find matches somewhat in thickness with the garment, and is made the same: woven or knitted. It will look better, than mixing thickness and fabric type.

  • take the pencil and paper, and draw your hand's outline, to make the pattern for the pocket. Leave some space around the hand because you don't want a very tight pocket. Use your smartphone as well, if you want to make sure it will fit into the future pocket.
Hacking my pants with a DIY pocket

Remove your hand, and realize the pocket will be too small and possibly too ugly too for an outer patch pocket. Decide at this point to use a bigger item, like an A5 agenda or notebook, or any other item of that size. Trace its outline on the paper instead of your hand.

Hacking my pants with a DIY pocket

You can use a different paper, the back of the one you used already, or the same paper like me. You may choose to erase the first attempt, like I did, or not.

  • Cut the paper pattern and use it to cut your fabric. While you could use the agenda or notebook to draw directly on the fabric, the paper is lighter, and you can attach it to said material to make sure it stays in place. This is especially helpful when you're not someone with more experience when it comes to sewing or making clothes.
Hacking my pants with a DIY pocket

Cutting the fabric should be easy enough if you laid the fabric completely flat. You just need to own good scissors for the purpose. Make sure to cut enough pieces for as many pockets you want to make. I cut 2 pieces but only used one.  But I may use the other one in the [near] future.

Hacking my pants with a DIY pocket

I had to cut away the seams of the pants, as I used the lower part. I also removed their hem as the fabric there was dirty and too thick. eww

  • The next step is to find a position for your pocket, on the garment. I recommend putting the garment on and then deciding where the best place would be. I chose it while the pants were off of me, and I didn't realize it would be too low. I did want it to cover 2 small holes that appeared in my pants [eww, no craftsmanship in the HM labor camps/factories and the cheapest yarn possible.]
Hacking my pants with a DIY pocket

While you're here, make sure you choose matching yarn as well. I measured it too, since I was about to had sew this patch and I don't need unlimited supply.

  • You're supposed to start sewing at this point. You are allowed to make some tea or coffee if you didn't have one before. Make sure to sew an upper hem as well - it will look more professional. You should also ensure to fold in in the edges of your pocket patch.
Hacking my pants with a DIY pocket

If you also chose pants or another garment that is pretty tight, or don't own a sewing machine [like me], you have to pay attention NOT to sew together the 2 sides of the item. You can avoid this accident by placing an agenda right under the working spot - like I did in the 3rd shot, in the image above.

In case you're wondering, I'm right handed, so I sew towards the left hand, but I placed the pictures in a left-to-right order ... I hope it doesn't confuse you.

  • When you're finally done, more likely an hour or more later, your pocket should look like in the image below. I think I will go with another sewing session, to give it more strength - I don't trust it much with just one go done by hand.
Hacking my pants with a DIY pocket

My partner said she likes it, and I think it's decent enough. I was lucky with the colors too as gray and pink look nice together. The pants are now more interesting, eye catching, and make my life easier when I don't want to carry a lot of stuff.

before and afterbefore and after

before and after

            I hope you find this little DIY project useful. See you next time!


            ©Charly Cross 2013 – present. . All rights reserved. [previously known as The Owner Travels To]

            Voir les commentaires

            1 2 > >>