Today I decided to make a stew and also share the process as well. This stew is 100% vegan, as i made sure not to use anything that was made by animals, or with their meat.
I'm hungry, so let's start the recipe already. Here are the ingredients:
potatoes -more than 1 kg (2.5 lbs? 3 lbs?)
2 medium carrots
some 300 grams of green beans (less than 1 lbs)
1 bell pepper (any color)
1 teaspoon of salt ? (depending on how salty you want it)
1 or 2 spoons of cooking oil
sweet or hot paprika (powder)
black pepper (you can use both powder and whole, or either one)
aromatic herbs - packed individually. -see the image below
You can also add a small eggplant in this stew, if you want. I don't recommend zucchini nor baby pumpkins - I tried and I found the experiment rather unpleasant.
METHOD:
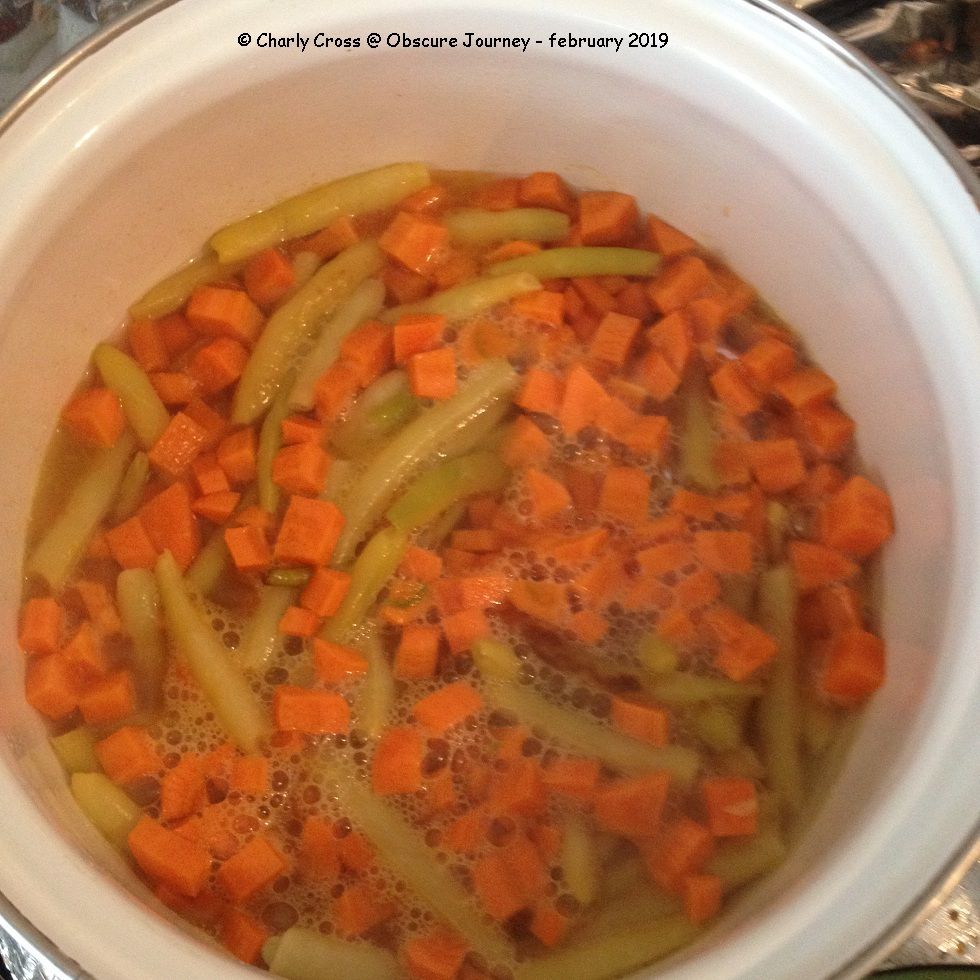
Take the beans and 2 spoons of oil, and put them in a large enough pot, that you place on a small fire or heat source.
Peel and dice your carrots, and place them on top of the beans. Also pour some water and some salt, and cover with a lid.
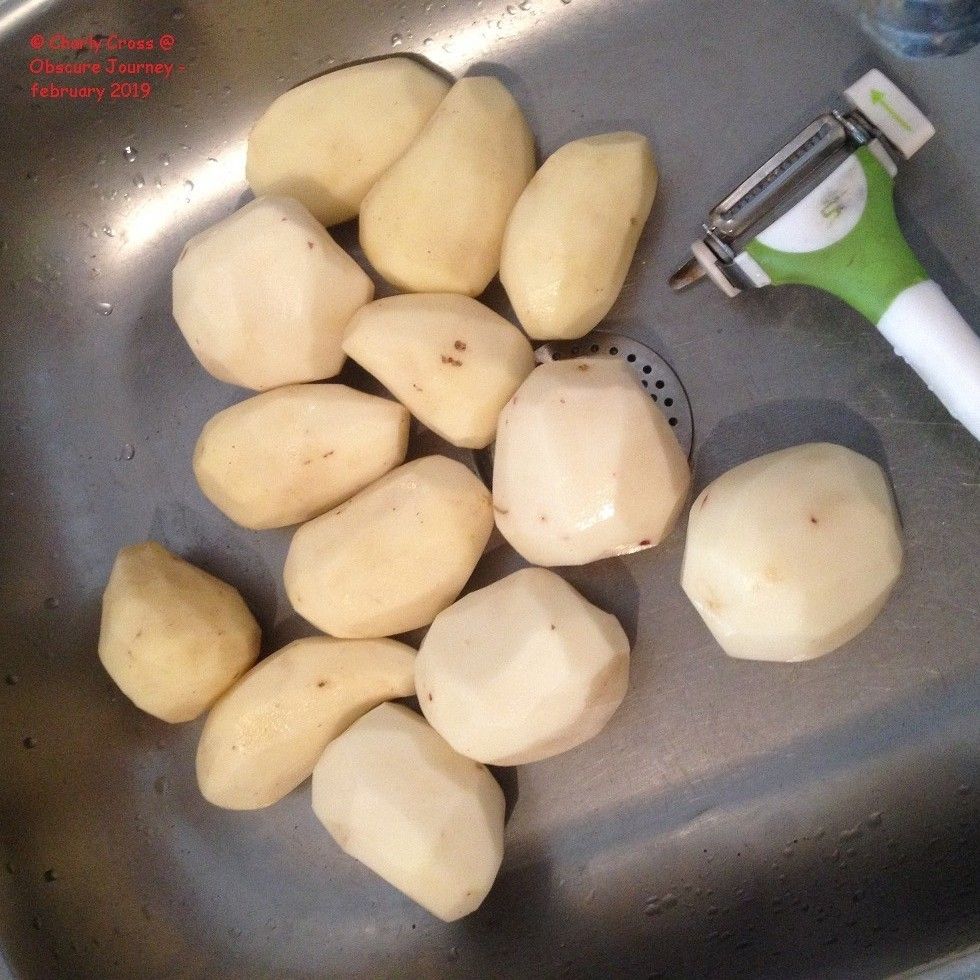
It's time to peel, wash and dice your potatoes. Potatoes cook much faster than carrots, and if the fire or heat is on medium to low, there won't be much to worry about.
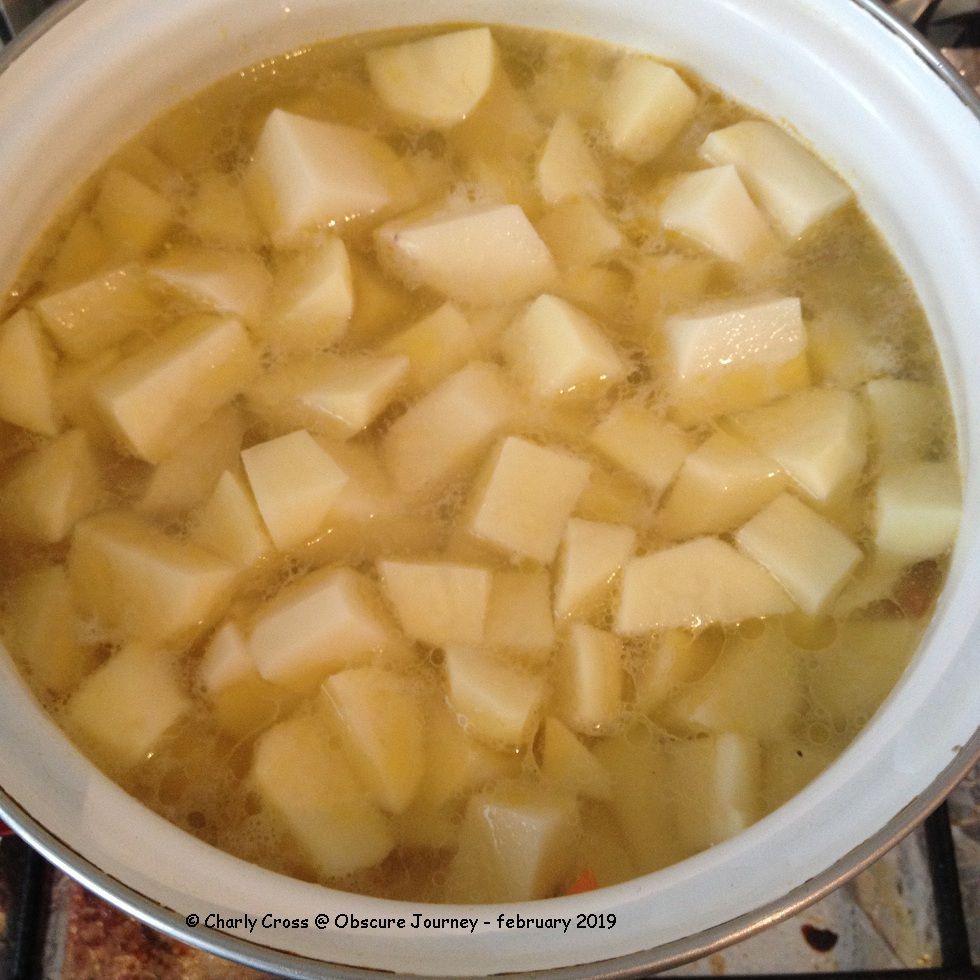
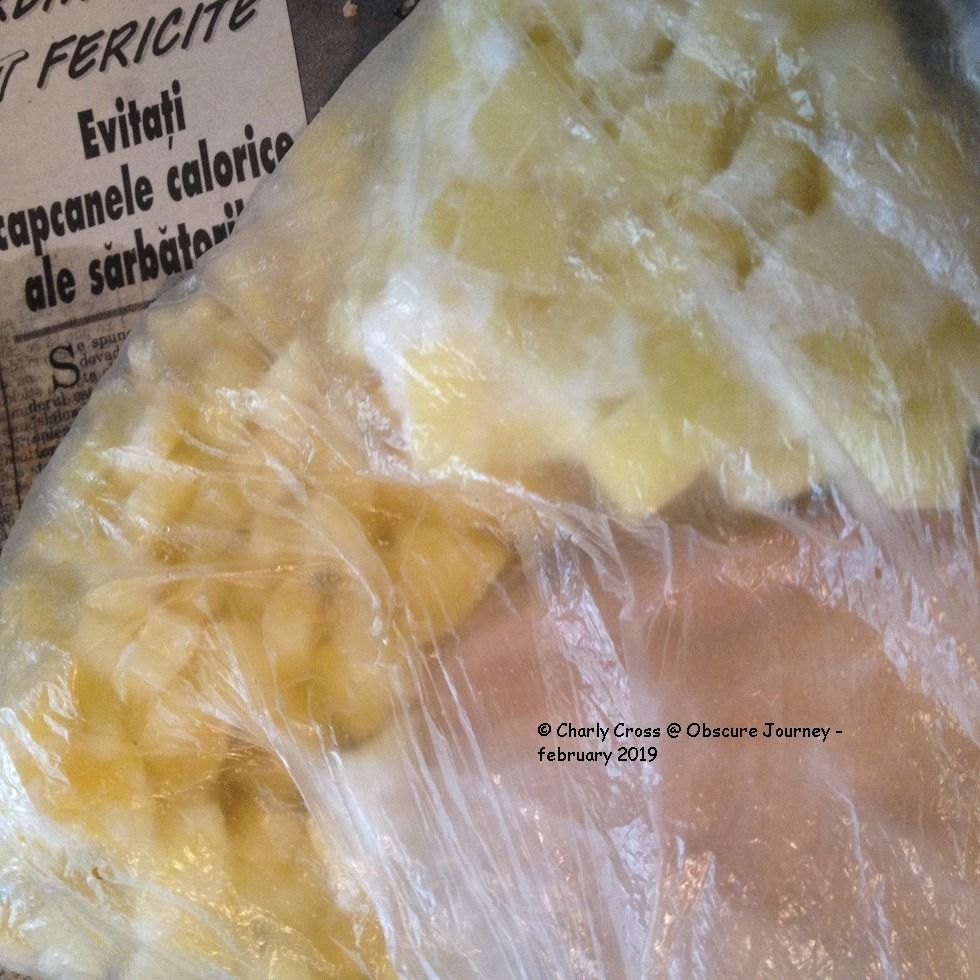
Once this is done, drop the cubed potatoes into the pot, and fill with water just enough to cover everything,much like in the image below. Now leave the pot to cook over medium heat for some 45 minutes.
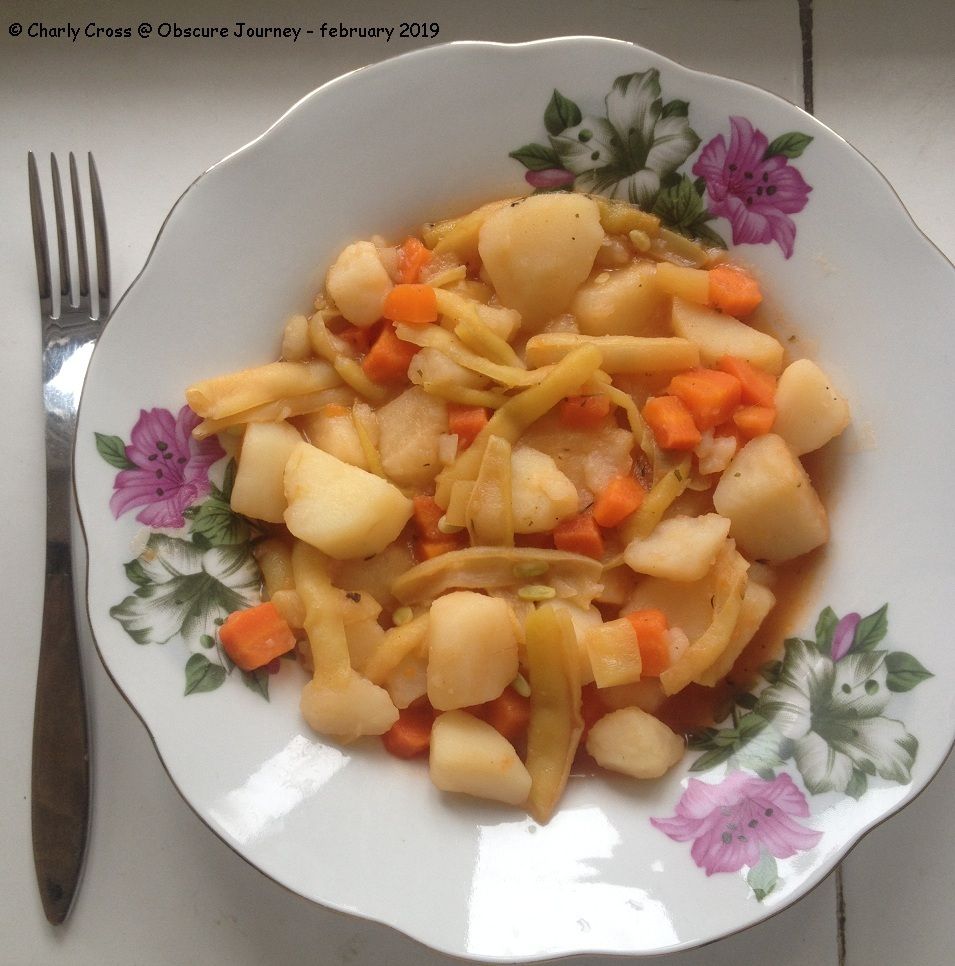
When the time is up, you add the condiments, herbs, chopped bell pepper (mine was frozen, so you can't see it well), and 2 spoons of tomato sauce.
Now, after you added all that, mix and let sit on the fire for some 15 minutes more. This is enough time for the bell pepper to cook and for the aromas to mix up, and flavor the dish.
Next, you can serve lava hot if you feel like it, but I recommend you wait some 30 minutes for it to cool down a little - it will still be delicious. You can serve it as is or with lettuce or Greek salad, fried tofu or fried soy meat substitute.
FOR MEAT EATERS:
You can also serve with chicken, with fried eggs, fish, and even with steak - basically anything that can be fried or roasted. You can put smoked bacon in it during cooking, if you really want to, for more flavor.
As you already know, I now own a sewing machine. So, I had to start using it. So here, I'll share my first completed sewing projects. I have to mention that the supplies I used were given to me - fabrics, thread, scissors. I only bought hand sewing needles and pin needles (which i still need to buy).
KITCHEN APRON
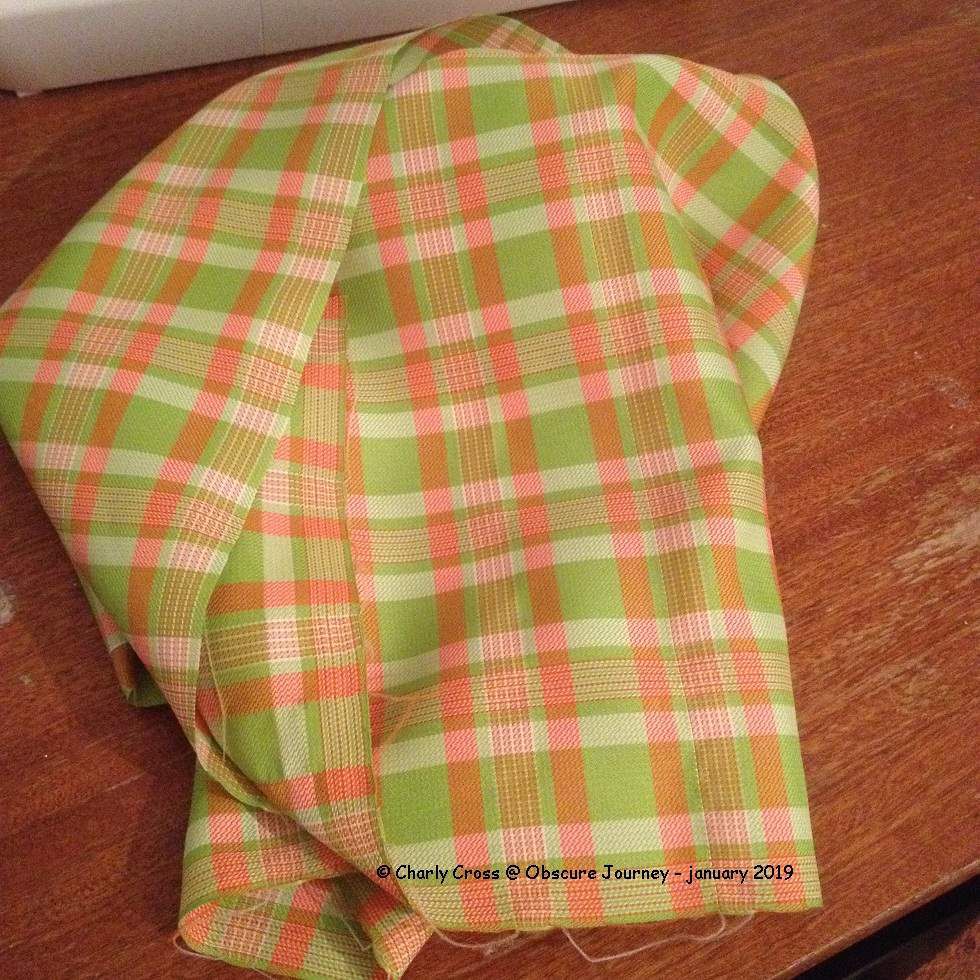
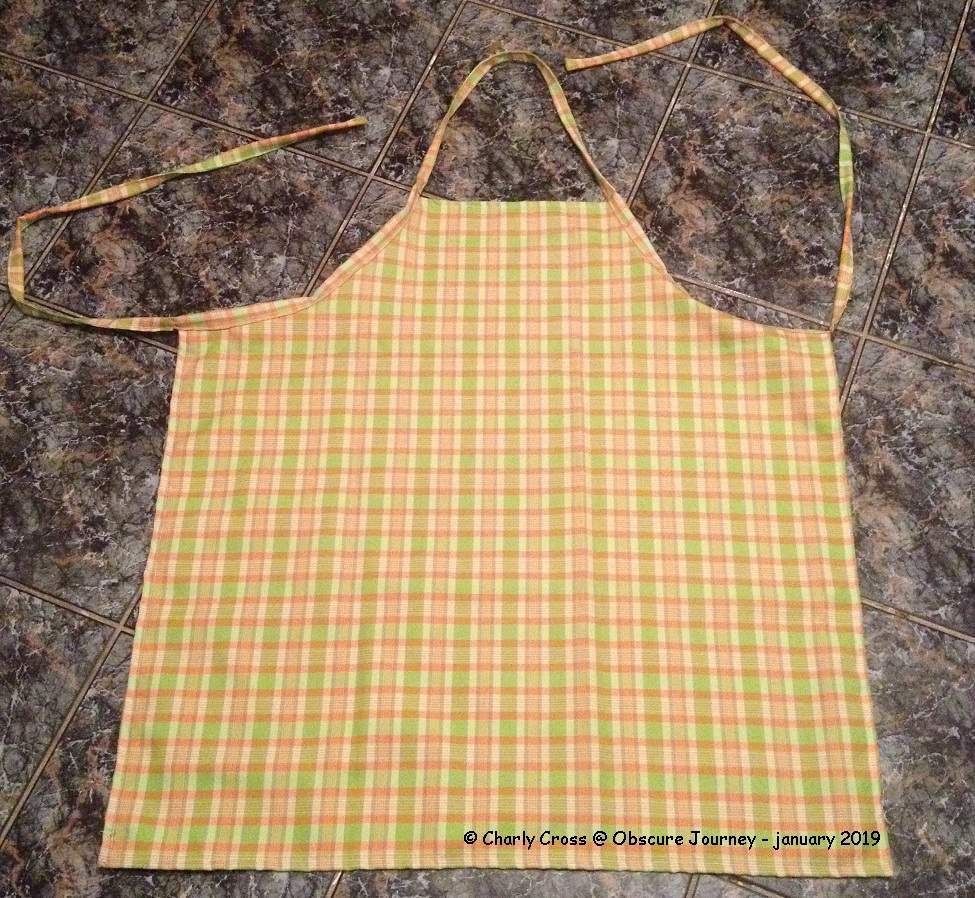
My first sewing project was a kitchen apron. It should be of no surprise, since I like cooking. I can't have too many aprons. Looking through the fabric pieces I had, to see which one would be a better choice for an apron, I found this "beauty".
The colors on it are neon green and neon orange, and not this reddish color. I thought it was a pretty fabric for an apron - really where could I wear such a color combination other than around the house?
The fibers are man-made, most likely polyester. It's a pretty stiff fabric? not very thin, but thanks to the grid pattern on it I could cut it straight enough.
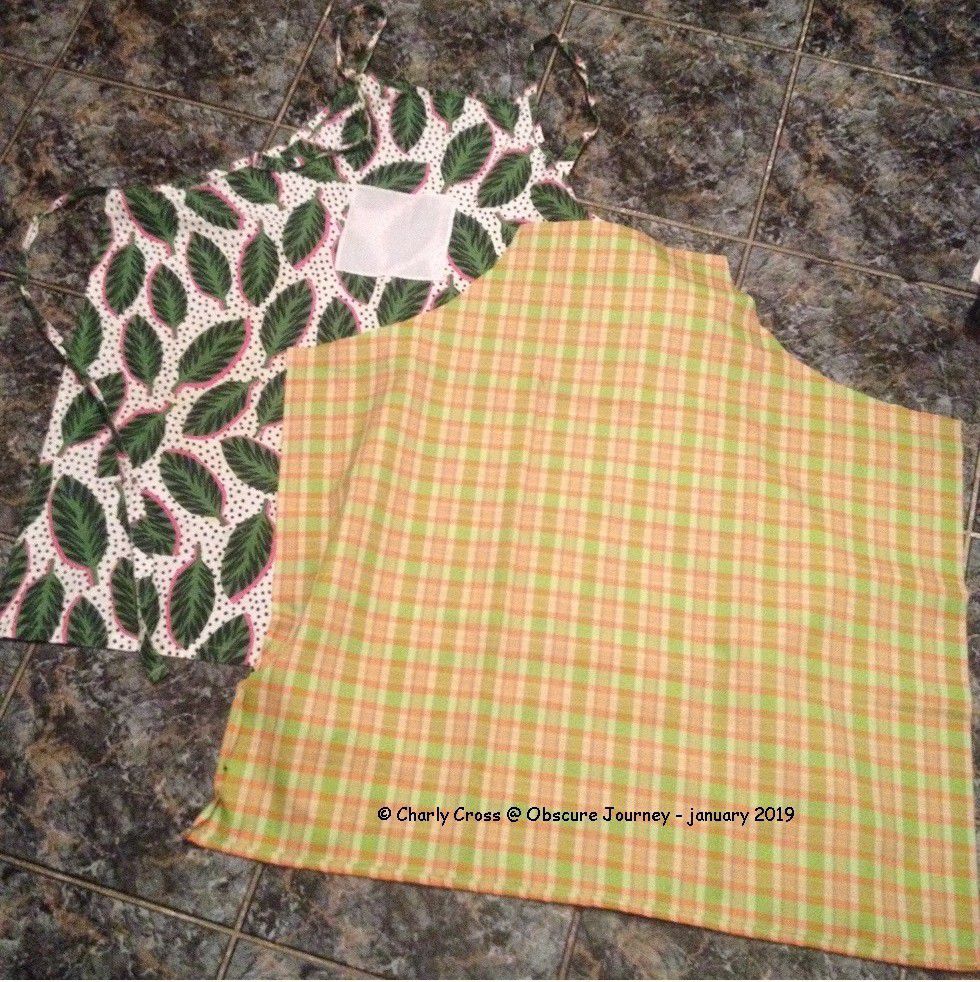
Now, I already had an apron from H&M, so I used that one as "guide lines". And because I forgot to take pictures from the start, you'll only see the already cut fabric. It also seems I had already one seam at least pinned down. The above picture, is actually of the left-over fabric, sorry to mislead you.
The colors are off because I did this after the sunset, and i have bad lights in the room - and i know everyone has them. Sometimes my creativity sparks in the evening, so I can't wait. I know it's a really bad habit.
So, to cut out this shape, I laid the fabric on the floor folded in half, in such a way to have most of the left over on one side. I can't tell which side of the fabric is the "right" one and which one is the "wrong" one, not with this particular piece, pattern and color combination. I folded my old apron in half as well, and i simply cut around it. I'm pretty sure I left some seam allowance, especially since i had to turn the edge in twice to avoid unravelling. This fabric can really unravel fast!
Then, i started sewing the straight edges, after I pinned them down. I wen't slowly since I had pins in the fabric, and I didn't want an accident to happen and ruin my machine, or worse.
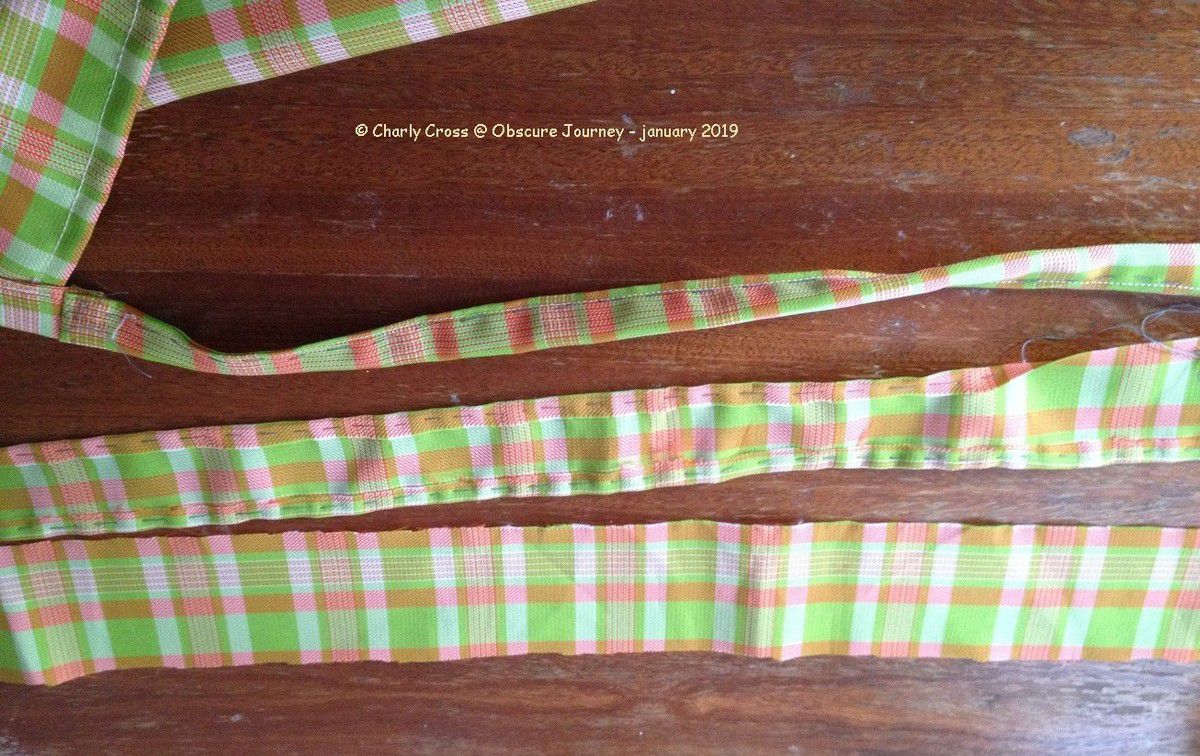
Then I had to make the ribbon-like strips of cloth that make the apron stay on the body. I cut 3 strips of cloth, 5 cm wide and some 60 cm long. The original apron has 4 of them, 2 tying around the waist and 2 around the neck, or a combination, depending on your imagination.
I also cut 2 strips to cover the rounded edges around the arms. These strips were also about 5 cm wide, and just a bit longer than what i needed. You can see a little bit of the ribbon after it was attached to one of the rounded sides of the apron. Because this specific ribbon was a bit longer, I left it as it was, and i sewed the other 3 ribbons to the "extension" - I didn't want the fabric to become too thick. Up close it doesn't look very nice, but from afar, nobody can tell i made this faux-pas.
To attach the narrow fabric to the rounded edges, I pinned down the fabric first. I had to make sure to attach the ribbon to the 'right' side of the apron, as once i made hems, it had a right and a wrong side. Then i used a straight stitch from one side to the other. I twisted the ribbon over to the front, and tried to pin it down with the raw edges in, and straight stitched it in place. It looks a bit wonky on the wrong side, but who can tell?
To make the ribbons that keep the apron on the body, I first had to stitch the edges be hand. the fabric was being difficult and I don't think I would have managed to do it by machine from first try. I had to make sure the raw edges stay inside the ribbon. I folded the ribbon in half, and straight stitched and attached to the apron.
And now the apron is complete! maybe not quite as complete as I want it to be. And can you spot the mistake? the neck-ribbon is twisted. Twice. and sewn in place. Yes, I didn't pay attention to that. And it kinda bothers me, but I won't fix it.
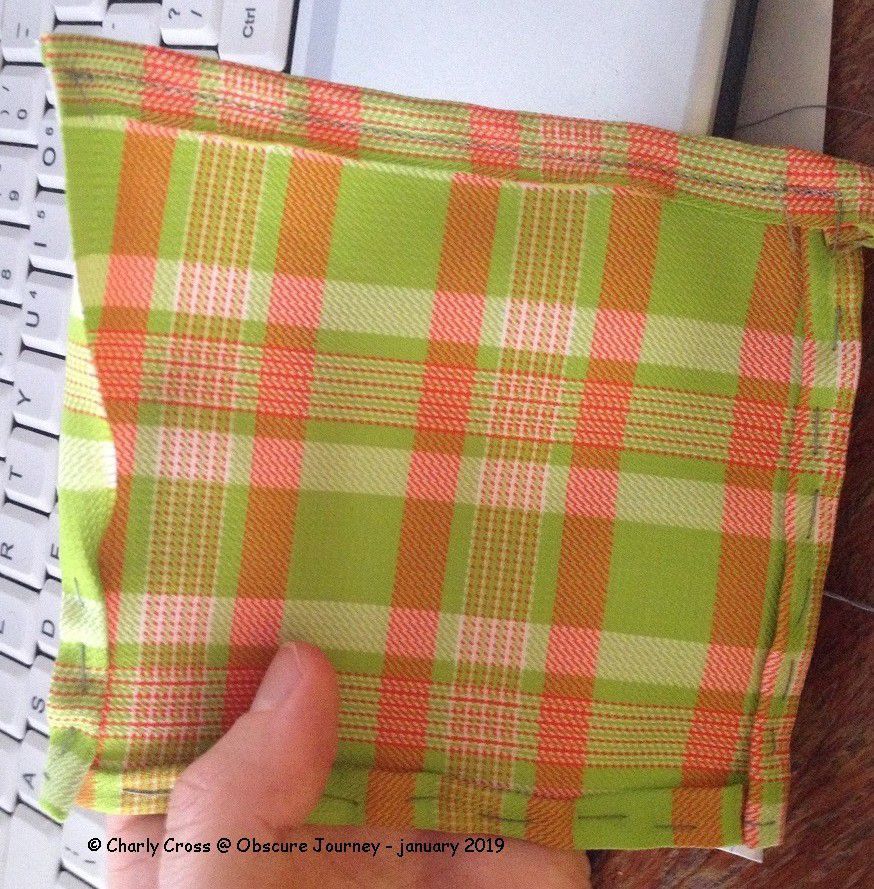
So, if you pay a bit of attention to the H&M apron, it has a white pocket. I put it there, because I feel it needs a pocket. So, i decided to make a small pocket for my new apron. And the nice part is that this apron and its pocket will look much better because they're from the same fabric.
The pocket is not very big, and I had to follow a similar approach as with the ribbons. I had to make sure the raw edges stay inside the hem/stitched part, so I made sure by using some thread, needle, and my hand. One of the edges, the one you see stitched by machine was the salvage part of the fabric, so I only turned it in once. I was then able to attach the pocket to the apron, and now it was really complete.
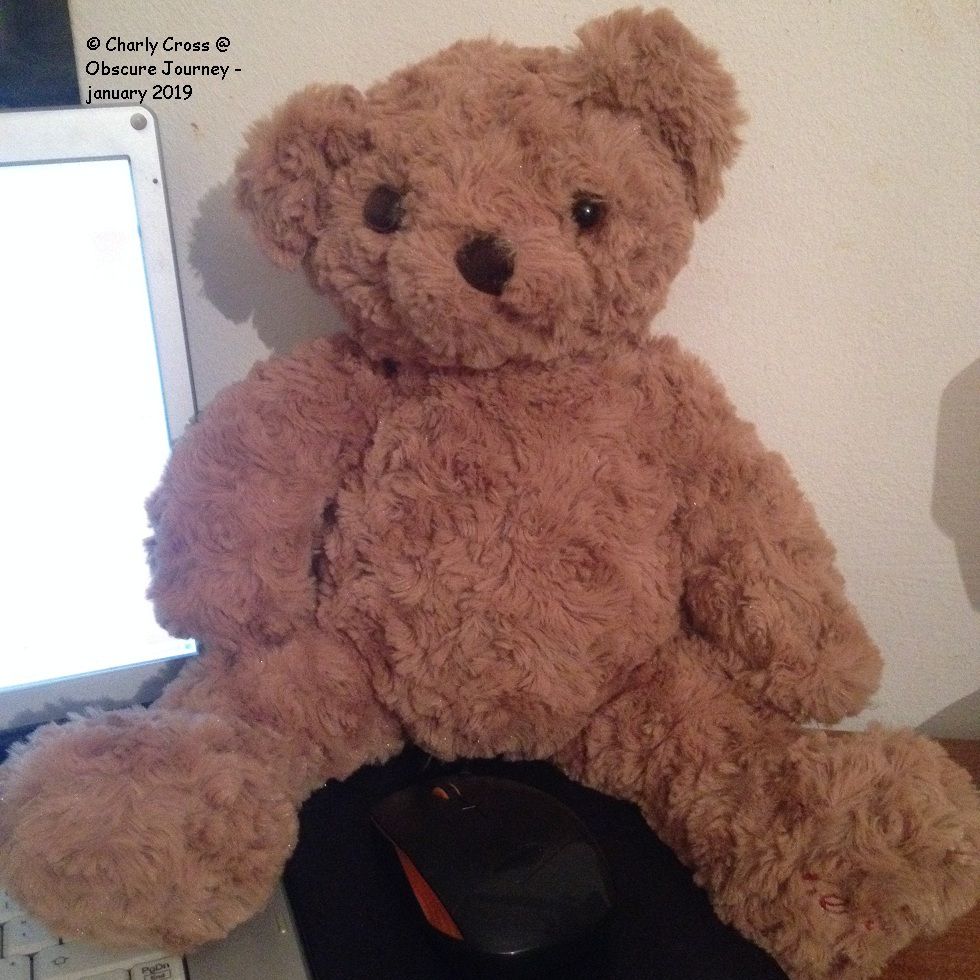
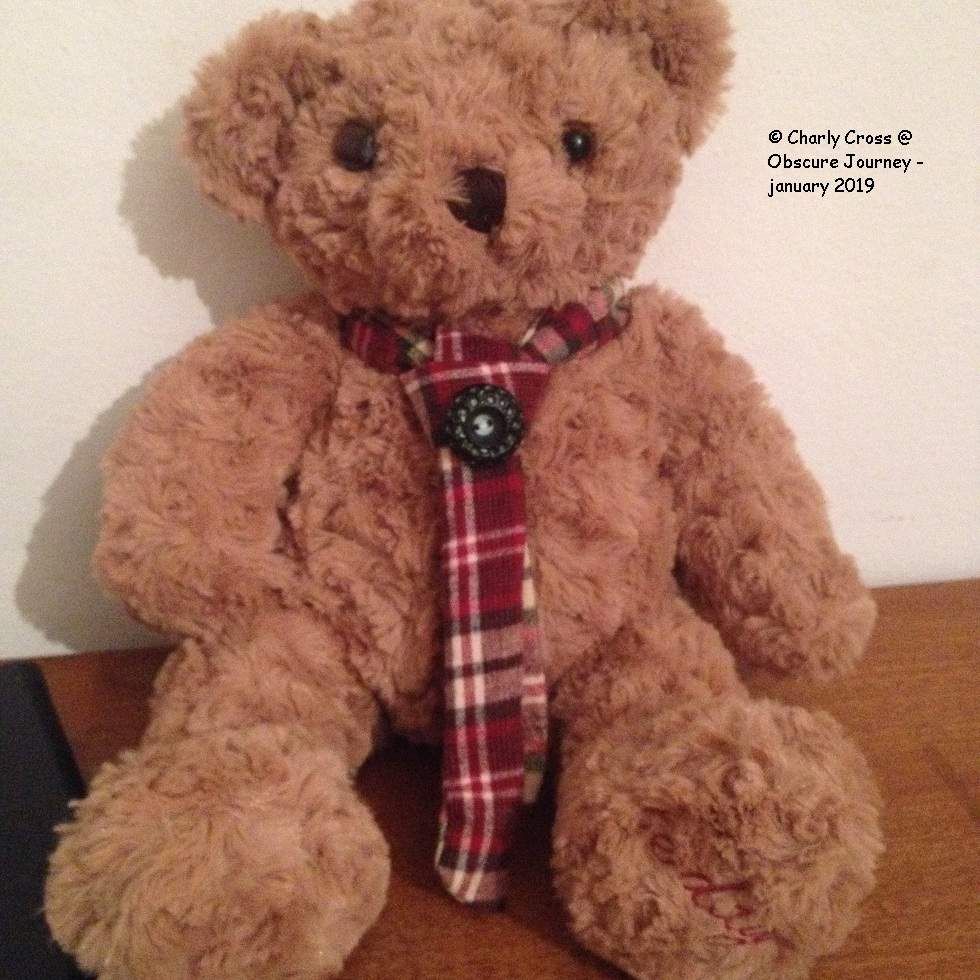
NECK-TIE FOR THE BEAR PLUSH TOY
The second project was a neck-tie for this plush toy. Well, I has to fix one of its eyes as well, as it was broken. I bought it on sale, for half the original price, because of his missing eye. I felt bad, ok? The non-shiny eye is actually a button I had.
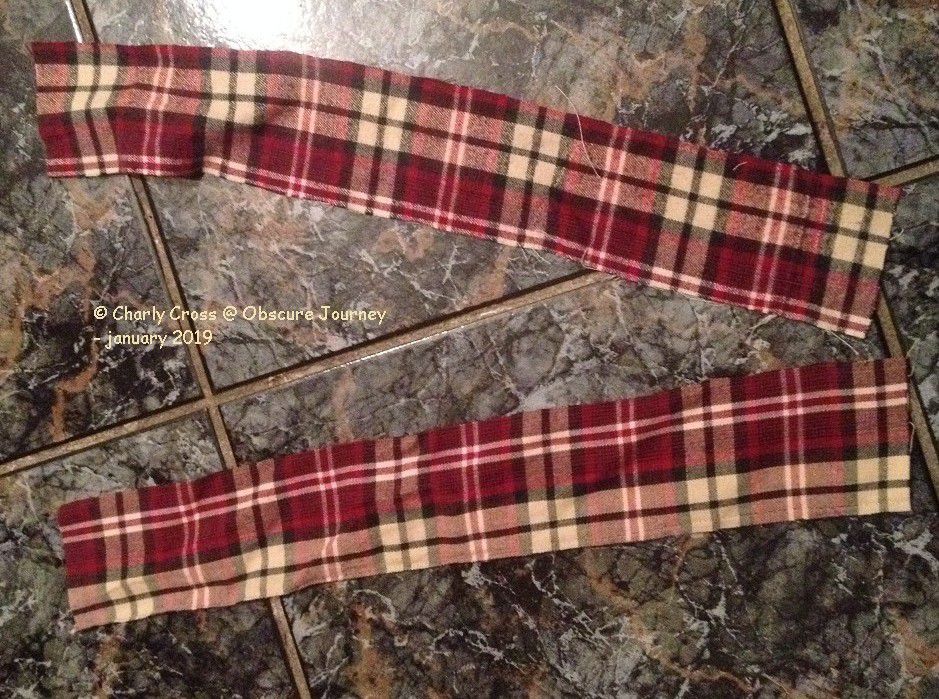
I thought the bear looks a bit boring or sad, so I thought it needs further grooming or cheering up. I decided to make a ribbon of sorts, that I would tie around its neck. I once had a flannel shirt that I didn't like for some reason. I cut it into pieces, hoping i'd make something else out if it, at a point when i didn't have a sewing machine. As a result, I decided to cut 2 strips from that fabric, and sew them together into a ribbon of sorts.
I first sew together 2 of the short edges, and then around the new longer strip, then to turn it inside-out. The idea was pretty good, but in practice it was pretty difficult. The new strip/ribbon was a bit too narrow and it was difficult for me to do. I only learned a trick for it to be done fast, a couple of days later.
The new ribbon was pretty long, and I decided it worked well as a neck tie. So, I made a tie knot around the bear's neck. I didn't think the look was complete, so I decided to add a button as extra decoration. I wasn't going to use that button for anything as it looked pretty ugly on its own. On the neck-tie, on the bear it looks quite elegant? chic? I find it pretty at least.
I hope you also like my projects. What else should I make? I already have in mind to make some clothes for Barbie. That's for a different, future, blog entry.
Life is a journey. Or so I have been told. ObscureJourney is a blog about My life, the things I experience and learn. I hope I can learn from my mistakes. The blog used to known as "TheOwnerTravelsTo" and i had a separate blog called "CookingMyExperience".
The purpose of obscurejourney blog is to share positive ideas and experiences -hopefully- while showing you that you don't need a lot to be happy.
Not all failures mean the end of the world. They mean that whatever you were trying out wasn't meant to happen:
it wasn't your life's journey. We all have a particular life journey, even if we don't discover it from the start. But remember:
You will discover your path! Do you think I discovered mine? Perhaps I did, but I have yet to fully walk it. I know writing is part of it.
Credits?
All content is created by me, with my silly mobile phone and its camera. Unless otherwise stated, the following applies:
All blog entries are written by me, Charly Cross -this is a pen name, unless mentioned otherwise.
Pictures are mine - especially if I signed them with a (c) and my blog's name (or former name of the blog).


/image%2F2671538%2F20210419%2Fob_819872_img-0313.JPG)


/image%2F2671538%2F20180226%2Fob_f9c4d6_charly.png)