Overblog
Suivre ce blog Administration + Créer mon blog

cooking

Learning about your tools

Publié le par Charly C.

Hello everyone!

Back in 2015, i wrote a blog entry about knowing your tools. That blog entry was related to cooking tools and i used a picture of the knives I had at the time. 

I will repost it along with an image or 2 with my current selection of knives. I wrote a blog post where i gave some tips to someone who just starts to sew. The blog entry i will repost here

We all know we need some sort of tools to be able to cook. One of the chefs' most important tools are his knives. Clearly, nobody can prepare food without a knife. And owning a good knife is also important.

[current thoughts? WOW, wai deep, LMFAO, but, ok, past me, carry on!]

cooking tools knives
My knives in 2015

I wonder how many of us use all of the knives they own when they cook, or when they eat? If you're not a chef or a butcher, you probably have a couple that you use every single day. You probably use the sharpest of them daily - I know I do.

Speaking of which, which knife do you think is sharpest here? Well, the one in the middle is - the flowery one. That's a santoku knife with a ceramic blade. I recently bought it and ever since then I'm wondering why did I wait for so long to buy one.

The santoku knife is a Japanese all-purpose knife. Japanese and Western knives are meant to be used in a different way, especially when butchering. When slicing, you probably use your knife as if it was a saw, going back and forth with the blade. If you ever buy a Japanese knife, NEVER try do to this.

Instead, place the blade on top of whatever you want to cut, and press down. Alternatively, place whatever end of the blade on the meat/ fruit/ vegetable, press and slide the blade through until you reach the other end of the blade and the cutting board, all in a single move! It's really that easy!

The black knife and the little knife to the left of my santoku, are the next sharpest knives I own. I use the little one for carving and peeling. I like to cut cheese with the black pointy one. It can cut really fresh bread much nicer than the bread knife - the large serrated one [the one looking like a saw].

The knife with a long blade and wrapped in the tape is one of the least sharp knives.. along with the butter knife {the blunt one with a light blue handle]. Kind of sad thinking that's supposed to be a chef's knife. The knife with a transparent handle cuts relatively good and I use it constantly for various tasks.

The knife I use the least is the one made entirely of steel. I'm not sure what I'm supposed to do with it. Its blade is serrated on one of its side. I occasionally cut cheese with it. The knife with a red handle a wavy blade, on the extreme right is the one I use to make "curly" french fries and potato chips. I also use it to slice cheese and cucumbers. It's used like the santoku: press down on the food item you want to cut. Makes the food look fancy for a party.

Now, that's all of the past entry. Let's bring this post in the year 2022. My current selection of knives is much smaller. At some point i realized i don't use the serrated bread knife much. I mean, we rarely buy bread that needs to be cut by hand, at home. Yes, we buy already sliced bread, or we slice it in the store, or just break from it at home. 

knives kitchen and cooking tools chopping board
My current selection of knives

I'm uploading this image straight from my iPhone, and I'm not sure why is it upside-down. The knife with a brown handle is relatively new to the house, but it was used by my mother before. I was also used by someone else before that. 

The flowery knife remained. Then, in the middle, i got what appears to be a cleaver, except it's not. it's very light-weight, has a sharp blade, and I believe it's an all-purpose one in China and some other East Asian countries. 

The knives i use the most these days is still the flowery one along with this butcher-like knife. The one with a brown handle gets used quite often as well. Its handle and weight feel wrong in my hand, therefore i don't actually enjoy using it. 

I can't remember when i last used the knife with a waved blade. You might want to know I also have some fancy-looking butter knives. I found them as a treasure back in 2019

The 2 small knives are for cutting or peeling vegetables or something of the like, i think. The one with a black handle is sharper than the IKEA one. I use them pretty often, mostly for fruits and various vegetables. Sometimes for slicing boiled eggs. 

What's even better these days, is that i can sharpen my knives whenever i feel like it. :D 

I don't know if you can really tell this knife sharpener has 3 ... "slits?" each "slit" is different. The one closest to the red handle is the roughest. The middle one is medium rough, and the one furthest away is the smoothest. 

I usually pass the knife through each "slit" about 10 times. This gives me a very sharp blade that can cut through anything almost like through soft butter. I don't sharpen every time i need to use the knives. 

I obviously can't sharpen the waved knife. However, i can sharpen the small knives. It's been a few years since i got the small ones, and i can't recall needing to sharpen the one with a black handle. I can't say the same about the one with a red handle.  

Want to learn how to sharpen a knife a home? watch this and this video!

How much do you know your knives?

©Charly Cross 2013 - present. All rights reserved.

Voir les commentaires

Making an American Apple Pie and Recipe

Publié le par Charly C.

Hello World~~~

Happy new year as well!

It's been a long time since I last shared a recipe with you. The last recipe i shared here is from June '21.

In fact, i haven't made this pie in a very long time. This recipe was originally posted on my cooking site/blog in 2014. That's where it all this obscure blogging journey started.

This recipe was first shared in May of 2014, but now i re-share it in mid-winter, aka January 2022. 

Sure pies are best enjoyed in autumn with fresh, local fruits. However, I find it a shame not to enjoy an apple pie at any time of the year if you think the apples are affordable enough. Plus, a homemade pie is better than any other sweet, isn't it?

If you want a Romanian apple pie, you might be disappointed. I know I am, unless some relative of somebody I know makes it. 

I knew the recipe for some time now, I even tried it out a few times before posting it. Why didn't I share it? To be honest, i have no idea why. my original reply was due to its square shape. This sounds very silly right now. 

I'm not sure why many places sell squared apple pie slices, most likely because they bake rectangular pies. I asked my friend to take a picture of a slice of pie, so I can share "my own" picture.

I'll have to make this pie again, to take more and better pictures of it. 

apple pie slice with cream on top on a white plate

Brown sugar is rather expensive here, and I didn't have it on hand. Maybe I will in the future if anyone will ever want me to cook for them and to pay me. ;) I may have altered the recipe a bit, but in my opinion, it only added to its taste. 

INGREDIENTS:
  • 1 Kg apples
  • 150 g caster sugar
  • 1-2 pinches salt
  • 1-2 teaspoon(s) lemon juice
  • 1 spoon of (all-purpose) flour
  • 145 g (1 cup) raisins
  • some cinnamon
  • pie sheets (or crust)
  • 1 small to medium egg

EXTRAS

  • any type of whipped cream
  • some vanilla sugar
METHOD:

Peel and remove the core from each apple. Slice them. Mix them with the raisins.

Mix the sugar, salt, flour, cinnamon, and lemon juice well. Include some vanilla sugar for more flavor.

Preheat the oven. Prepare your baking tray, however, you are used to. Place the pie sheets or crust onto the tray. Make sure you have some left to cover the top of the pie.

Pour the mixture over the apples, or the apples on top of the mixture. Make sure all slices get well coated with a sugary mixture.

Nicely place the coated fruits on top of the pie crust in the baking tray.

Beat the egg. Pour the egg on top of the pie and spread it well to cover the top using a kitchen brush. Sprinkle some sugar or some more vanilla sugar on top.

Place the pie in the oven and bake for 35 to 40 minutes. I baked mine for some 37 minutes on really low heat.  When it's done, remove it from the oven and let it chill. When it's chill enough put it in the fridge till you're ready to serve.

When you serve, decorate with some whipped cream or ice cream, maybe some cinnamon, and whatever else you think might taste good. And, of course, don't forget to slice it up as well. 

NOTES:
  • I use a gas oven, with real fire. The fire was on its lowest, but I preheated it for a longer time than I intended.
  • I used whipped cream powder that I had to beat with milk. Water is also good, as it makes the cream lighter and less nauseous.
  • For me, many sweets and foods taste better when they're cold. The pie is one of them.

Bon Appetit!

©Charly Cross 2013 - present. All rights reserved. 

Voir les commentaires

Toasting Bread [blog entry]

Publié le par Charly C.

Hi all. Long time no sign. Sorry about that. 

This entry appeared back in 2015 on my first ever blog that i deleted. 

It's a very short entry, and most of the story is told through a drawing. We all know that a picture speaks a thousand words. 

This is a true story. It was quite normal back then for this to happen. It didn't happen i recent times anymore.  This is because I started using a timer to avoid this from happening. 

Whenever I want to toast some bread I have to be really careful. Or else my bread will turn to ashes.

i drew this in paint back then in 2015

I don't own a toaster and so I have to toast my bread in the oven. My oven works with gas and real fire, but the machine itself is so old it's not even funny.

At some point after that, we changed the cooking stove. But it still works with gas and fire, and I still managed to burn the bread meant to be toast. 

I also often forget I'm making toast, so I have to set up an alarm for when I think the toast might be done. When using this method, my toast is under-done. Basically, this means the bread is not golden-brown the way you see in commercials and stuff.

This was a rather upsetting event at the time. I even manage to burn water, if you know what i mean. 

Can anyone else relate to this?

My eyes are supposed to be green. [in case you were wondering]. Because that's my real eye color. 

©Charly Cross 2013 - present. All rights reserved.

Voir les commentaires

Cat-shaped "minciunele"

Publié le par Charly C.

Hello, world! 

Today I'll share with you my results trying to make a common Romanian dessert, called "minciunele." This word means little lies and they're a type of donuts. 

As you can see from the pictures, this recipe was supposed to appear quite some time ago. In fact, i had already posted this recipe on my first blog, before i rebranded for the first time. 

When I first started blogging, I thought i'd have a cooking blog and another blog for other stuff. As we all know, things changed, and now i have this "general" blog and my site/blog dedicated to reviews, called Being Obscure, hosted by WordPress. 

The recipe goes something like this, and you can see the original recipe and results here. This is the blog dedicated to recipes for Romanian foods. The post shows you how these are supposed to look like, and you can clearly see my cats don't look as nice as the original. 

If you want to know why i chose to shape my donuts as cats, I'll add the story AFTER the recipe. I recently realized people don't appreciate too much talking BEFORE the recipe. So, without further ado, here we go!

Ingredients:
  • 500 g flour (1lb?)
  • 2 eggs
  • 2 yolks
  • 2 tablespoons of sour cream
  • 1 teaspoon of baking powder
Additional ingredients:
  • some powdered sugar for coating
  • some sunflower oil for frying; whatever other type of oil you use for frying food should also work. 
Method:
  • Beat the egg whites until they're fluffy.
  • Mix the egg yolks with the sour cream and gently fold this mix into the egg whites. 
  • Sieve the flour and the baking powder on top of the mix.
  • Gently fold these also into the mixture above, until you have a smooth dough. 

The original recipe doesn't say to let the dough rest and raise a bit, so I didn't do that. However, I think it should be done, and i think it should be at least 30 minutes. 

Roll the dough onto a sheet on the work table (about 5 mm or 2/8in thick) and cut your shapes. Of course, you can cut whatever shapes you want - i also did that. 

To cut shapes you can use cookie cutters, a glass, or directly a knife. The difference is that with the knife things will be easier and much faster, while with the cookie cutters/glass you'll need to reroll the dough. You don't want to waste all that yumminess. ;)

Fry your shapes in hot oil, over medium heat, and on both sides. If you have too many donuts and you run low on oil, add some more oil, and make sure it gets hot before you fry more donuts. 

When they're brown on both sides, remove them and place them on a plate or a bowl covered with some paper towel or (unscented, dry) paper handkerhiefs. The paper will absorb the excess oil. 

In the picture above, you can see I'm frying donuts in other shapes than cats. 

Once you're done frying all the dough, sprinkle some confectioner's sugar on top. These are always better with some of that on top. 

I never tried, but these could also be good with some chocolate or cream on top. 

Bon Appétit! Enjoy!

Why cat-shaped?

I believe that at some point in 2017, the butter we usually buy came with a little cutter. There were 3 shapes: cat, car, and i forgot what else. They were meant to help mothers make cute sandwiches for their kids, to entice them to eat and enjoy the food more. 

I got the butter that had the cat-shaped cutter. I never really used it since, but one day, when i made these donuts, Anna jokingly challenged me to make them look like cats, thinking it would be impossible for me to do so. 

The expression on her face when i pulled out the cat-shaped cookie cutter? PRICELESS! 

So, this is how you make another type of easy doughnuts. i hope you liked the story about the cookie-cutter shaped like a cat as well. 

As a reference, i have 2 more cutters for cookies: one shaped like spectacles and another shaped like lips. These are from H&M Home. I got them on sale, i think right before the SHTF last year. 

The yellow disk is a cookie or cake decorator i found in the lid of a jar of Nutella. I forgot the year. maybe 2019. 

See you next time! 

© Charly Cross 2013 - present. All rights reserved.

Voir les commentaires

An all time favorite for Romanians - Polenta

Publié le par Charly C.

Hello everyone!

I'm not sure I was supposed to post anything today, but I realized this recipe wasn't moved from my old cooking blog. I thought it might be time I moved it. 

Quite honestly, I almost forgot I still had recipes on that old blog. 

As you'll see, the pics are very bad, undated, but they're from at least 2015. That's why they're bad and I don't have a visual step-by-step of the process. 

Ok, below you'll see the "original" post. Enjoy your reading!

Coming to Romania you'll want to try some traditional food, even though I don't believe there is any dish that is exclusively "traditional Romanian." What you'll eat instead is food almost every Romanian knows how to make, especially in the countryside. Sadly, eating this in the capital, might not taste the same as it would in some forsaken village, but this doesn't mean it won't be tasty.

From my old blog. i need new pics.

Polenta seems to be every peasant's replacement for bread and therefore eaten mostly with other foods. However polenta is so popular it can be eaten by itself as well.. well sort of by itself. Mixing it with butter and some type of salty cheese will make it delicious and a dish that can be served as a stand-alone.

INGREDIENTS
  • 1 liter of water (or less)
  • some cornflour, better known as polenta in some countries. [all i know its that it's dry, yellow, rough, and made of corn]
  • some salt
  • between 1 and 3 spoons of butter - margarine also works
  • some cheese - feta cheese is just an example. Make sure the cheese melts, you'll thank me later.
  • Optional:
    • black pepper
    • boiled egg
    • bacon or sausages
from my old blog. i need new pics.
METHOD
  • Place the water with salt on fire and bring it to a boil.
  • When it starts to boil, start slowly adding the polenta-corn flour. Make sure to mix in a circular motion with a wooden spoon. You're better off at mixing with its handle - it mixes better, trust me on this one. Make sure it boils well!
  • Cut the cheese into small cubes. Best size? about half your thumb finger.
  • Add the cornflour until the mixture thickens and sticks to your spoon. It is done when you have the impression you can form balls with it, without them falling apart. You'll want it rather thick and sticky than runny or soft.
  • Add the butter and mix well. The butter will soften the mixture - this is what you want.
  • Add the cheese and mix. The cheese will start melting - this is what you want to happen. ;)
  • Add some black pepper on top after you serve on a dish or in a bowl.

This dish is best served hot, especially in winter, but having it cold in summer is just fine too.

I like it warm regardless of the season, lol. You could say this is a type of comfort food for me.

Here I had it with some fried soy pieces and some bell pepper. You can have it with sauerkraut, sausages, fish, and almost any other food that has sauce.

Bon Apettit!

PS: yes, all these failed pics are mine -_-' I need to make polenta again and to take better pics of the process. 


© Charly Cross 2013 - present.

Voir les commentaires

Making salad "à la russe"

Publié le par Charly C.

Happy new year! 

I have no idea since when you guys read my ramblings here. But with a quick search in my past entries, you'll see that at the end of each year, for the past 2 or 3 years, i tried to post some "End of the year thoughts". See here, here.

This time i decided against it. I have more reasons:

  • All December I had work to do (my main job)
  • I tried to do/did blogmas (see my recent posts or the link)
  • I have this entry where i drew a bit of a line for 2020.

For blogmas day 10, we were supposed to talk about the Christmas menu. And I did. And i mentioned that, traditionally, in Romania, people like to make salad à la russe. 

made by mother and given to us for new year's

I looked through my shared recipes and i noticed that i haven't shared this one yet, despite having made it quite a few times already. 

Well, now's the time to share the recipe! 

INGREDIENTS

We wanted to make a lot of salad this time around because we really like it. This wasn't the best idea ever but we did it anyway, so here we go.

We used for the salad:

  • 2.5 kg potatoes
  • some 4 carrots
  • 4 -5? pickled cucumbers
  • some salt
  • 1 big jar of peas (already cooked, drained)
  • egg-whites from 1 or 2 boiled eggs

We decided to make our own mayonnaise, but to also buy some, in case I fail at making the mayo. I remember the first time I made mayonnaise - it was thick, yummy, and I was proud of myself. 

Most likely, after that, I was over-confident, as the next other times I made it, it didn't turn out quite the same. Oh, well, we live, practice, and then we become better. 

For the mayo I used:

  • 1 egg yolk (from a boiled egg)
  • 1 raw egg -whole
  • some mustard 
  • some salt
  • oil (as much as needed)

For decoration: (you can use what you have on hand, these are the most common things you'll see in Romania, on this dish)

  • black olives - pitted
  • pickled red peppers
  • pickled cucumbers
  • pickled carrots
  • fresh parsley (not other herbs)
  • hard-boiled egg(s)
METHOD

For this salad, we have to boil the potatoes and the carrots, then dice them. The dice shouldn't be too small, nor too big. You want the dice to be actually smaller, rather than larger, so that the salad would have a smoother appearance. 

If the dice are larger, the salad will look as if you made it with rocks and boulders instead of potatoes.

We decided to boil these 1 day ahead. And as you can see from my pictures, i boiled the potatoes for far too long. They shouldn't crack like that. The potatoes should be cooked, but firm for this salad.

Maybe I should have used red potatoes? I have no idea, but almost every time I try making this dish, I overboil my potatoes and they're far better mashed than diced. 

As you can see, I used larger pieces of carrots. I think by weight, the carrots are half the weight of the potatoes, maybe even less than that.  

Given the quantities, you'll need a very large bowl in which you'll throw everything for mixing. 

I suggest that on the day you want to prepare this, you first make the mayonnaise. If you don't want to make it, you better buy 2 bigger jars of mayo. 

To make things better, get the fancier, more expensive brand. It should taste better. The type and taste of the pickles, as well as that of the mayonnaise, are the secrets to this dish.

These 2 ingredients will make or break the taste of the whole thing and will decide if you like it or not. 

So, to make mayonnaise, you have to mix the hard-boiled egg yolk, the raw egg yolk, some salt, some mustard, with plenty of oil. 

The best tool for mixing, I noticed/learned to be the vertical blender part of your mixer. You add the oil bit by bit, and you might also need to add some salt and mustard from time to time. 

If you think the mayo looks too thick (almost like cream cheese) you can add the raw egg white as well. Try not to add it all at once as you could ruin the result, or it may take some time for the mayo to re-gain a decently thick consistency (yogurt-like). 

Once you figured the mayo out, cover it and put it in the fridge to rest. Now you can start dicing the potatoes, carrots, and pickles.

You throw these in the large pot/container along with the drained peas. For reference, I used the pot in which I boiled the potatoes after cleaning it.  

At the end, you can also throw in a hard-boiled egg you diced. This improves the taste of the salad. Don't forget to add some salt in with everything, or this will be a bit sweet and tasteless. This is not something you want.

As you can see, I diced my potatoes in sizes that are a bit too big. They should have been half that size, thus slightly larger than the peas. I also forgot to add the salt. And that's not the only thing i forgot to add. 

Now, it's time to add in the mayonnaise and to get your hand dirty. Mixing with a spoon is fine, but I feel I have better control over the mixing process if I use my hand. 

Once you're done, you can transfer the salad to other containers or plates, for decoration. I used 2 plates and a big soup bowl - i forgot its name. 

 And then, you'll need to use your imagination on decorating these. Nature-inspired decor (like flowers, or the sun) looks the best - somehow it balances out the heaviness of the mayonnaise. Red, orange, and black give it a nice visual contrast.

Above, you can see the decor I came up with. I had black olives in the fridge, but i forgot about them at first. I added some after, but i didn't take pictures anymore. 

Like i said, this is best eaten the day after you prepare it, so that the flavors mix in a bit more. We eat this usually on its own, but with bread. Extra pickles also work, as there is plenty of mayonnaise to make one nauseous. I think it's served before dishes with meat. 

I hope you can give this salad a go and that if you do, you'll enjoy it as much as we do. 

Bon Appetit! 

© Charly Cross 2013 - present. All rights reserved.

Voir les commentaires

Blogmas Day 10 - Christmas Menu

Publié le par Charly C.

Hello all!

So today I'm supposed to plan the menu for Christmas. Except I don't need to because every year we eat the same thing. 

See, here in Romania, there are a set-in-stone celebration dishes. Everyone makes the same food. Rarely there's any variation. 

One of the first things that need to be made for Christmas, or any other big celebration that is, is the cozonac

I personally never made one, so I don't have a recipe for it. As type of food, this is a dessert. By the method used to make one, it is a bread. So basically, it's a sweet bread and traditionally it has a filling made of nuts and cocoa. Rum (the alcohol) or rum essence (flavoring) can also be used in the filling. 

Blogmas Day 10 - Christmas Menu

Of course, nowadays it is very common for city folks to buy one or a few. In the country side, it is still being made the traditional way.

The cozonac found int he city comes in different shapes and flavors, with some of them better than others. 

Another dish that cannot be missing from the Christmas table are the sarmale. This dish comes from Turkey and if you know that dish you'll know this one as well. 

We have cabbage leaves wrapped around a filling made of rice mixed with meat. Generally, the meat is a mixture of beef and pork. I talked a bit about the filling in this article. 

You just have to take about a spoonful of filling mixture and put it on the cabbage leaf, then to roll or pack the whole thing neatly. We'll most likely receive some Sarmale, if everything goes smoothly this year, considering the virus. 

Sarmale are labor intensive and this is why they're kept for special occasions. These special occasions can include weddings and funerals, especially in the countryside. 

Another dish you'll see is the Oliver's Salad, though it's usually called Boeuf Salad or A la Russe. There's actually a small difference between Boeuf and A la Russe: the former has meat and the latter does not. Otherwise, they look the same and generally have the same ingredients. 

The ingredients are boiled potatoes, carrots, peas, pickles, black olives, and mayonnaise. Everything gets chopped and mixed together. It is usually decorated with olives, boiled eggs, and red pickled peppers. This salad i plan on making. I made it before, and i can't believe i have zero pictures as proof, though i had some pretty ones made. 

Creator & Copyright: Dana Valery from retete-culinare-cu-dana-valery.ro/reteta/salata-a-la-russe-cu-legume-si-maioneza

That's what it can look like and the link will take you to a recipe in Romanian. Google Translate can be your friend.

This salad should be made a day or two in advance, so that the flavors mix well. It's definitely a dish that tastes better at least the next day, and it has to be kept in the fridge. 

The taste depends greatly on the pickles used as well as on the mayonnaise. It's best to make the mayonnaise at home, from scratch as it tastes better than the one from the store. 

Many people would prepare many dishes based on pork, as they butcher a pig a few days before Christmas. The most notable dishes are steak and home-made sausages. 

Some people will replace the pork with a roasted chicken or maybe beef. 

This is it for now! see you in blogmas day 11!

© Charly Cross 2013 - present. All rights reserved.

Voir les commentaires

Fool proof doughnuts

Publié le par Charly C.

Hello world~~

DISCLAIMER: This article was originally published back in 2013. I edited it once, to add another picture, because i though the presentation lacked a little. Now, in 2020, i remade these doughnuts, and i took more pictures. I want to add them here, so this means this article will be republished. 

My friend showed me the recipe for these doughnuts on a local website and since I had all the ingredients, I figured I should try it out.  

The best part is that they’re done so fast, you don’t need to wait for the dough to raise,  and they’re very yummy and light! You’ll want to double the quantities the 2nd time around, hehe ;) 

You probably won’t believe me, but even a 14 year old boy made these, or it was him sharing the recipe.

The pictures in this article/recipe are mine.


The original, sad picture i used. oh, gosh.

The original, sad picture i used. oh, gosh.

INGREDIENTS

  • 200 grams yogurt
  • 1 egg
  • 3 spoons sugar
  • some baking powder
  • 1 pinch of salt
  • 150 grams flour
  • 1 Tbsp lemon peel – lemon essence works fine too.

I have to mention that this year we learned my friend can't eat a lot of things, including gluten, or at least not a lot of it.

So you can replace regular flour with gluten free flour or whole grain flour.

This year i also skipped the lemon peel (zest) or essence as well. Instead, i used vanilla extract. My friend was diagnosed with asthma, and lemon essence is bad for them, as some of you may know. 

I wish mine turned out this pretty :(I wish mine turned out this pretty :(

I wish mine turned out this pretty :(

METHOD

Mix all the ingredients together. Originally, I was supposed to add them one by one, but we want to be as quick as possible, even if we stay the whole day at home. 

Make sure everything is well incorporated though. The dough should be a bit thicker than the mayonnaise.  Thicker dough will make rounder doughnuts, while a thinner one will turn into funny looking doughnuts.  

I forgot to take a picture of the dough after i mixed it. Therefore, here you can admire my dough almost at the end. 

My dough was thicker, thus the doughnuts have a more regular, ball-like shape.

This is the time to adjust the sweetness, by adding more sugar if you so wish. Of course, this means you'd have to taste the dough. Make sure not to eat it all. Whatever you may add, incorporate well once again. It should be smooth. 

You can even add more flour, to make the dough thicker. IT should still be a bit runny though. My spoon is a hint to why.

At this point I added some grounded nuts back in 2013. - Side note: Reading this in 2020, i recall no such thing, but it must have happened. 

What mine turned out like :(

What mine turned out like :(

You'll now need a small pot or a frying pan. 

You need to have a thick layer of oil for frying in there. As you may know, doughnuts need to be fried. 

Heat the oil up. Don't use too much heat. I used low to medium heat. I kept it constant. 

Take a spoon, scoop dough out and drop it in the pan. You can fry more at once, depending on how big your pot or pan is. 

I could fit about 6 in my pan. It's normal for the doughnuts to have "legs" or whatever you want to call the little drops that fell from the spoon, next to the actual doughnuts.

The softer/thinner the dough, the more such "legs" will form. These "legs"are also a bit wasteful, because they get burned and nobody will eat them. I think i added more flour to make the dough thicker to have less waste.

You'll fry them on both sides, until they become golden/brown. They'll start floating at some point. That's when you'll turn them on the other side.

If you feel they become brown too fast, lower the heat a little. I cook with gas, so i can't really tell you how high my flame was. It was one of the largest burners, which was a bit too much for this smallish pan. 

You'll have to turn then around to check their color, to be even on both sides. 

When the first ones are done, remove them to a plate, or a large bowl. Make sure to use a paper towel on the bottom, as the doughnuts will still leak some oil. You don't want the ones at the bottom to sit in a puddle of oil, ewww. 

When you’re done frying all of them, just sprinkle them with confectioner’s sugar, chocolate syrup, or anything else you prefer for more yummyness.

Bon appetit!

© Charly Cross 2013 - present. All rights reserved.

entry edited in May 2018 first, then in 2020. all pictures are mine.

Voir les commentaires

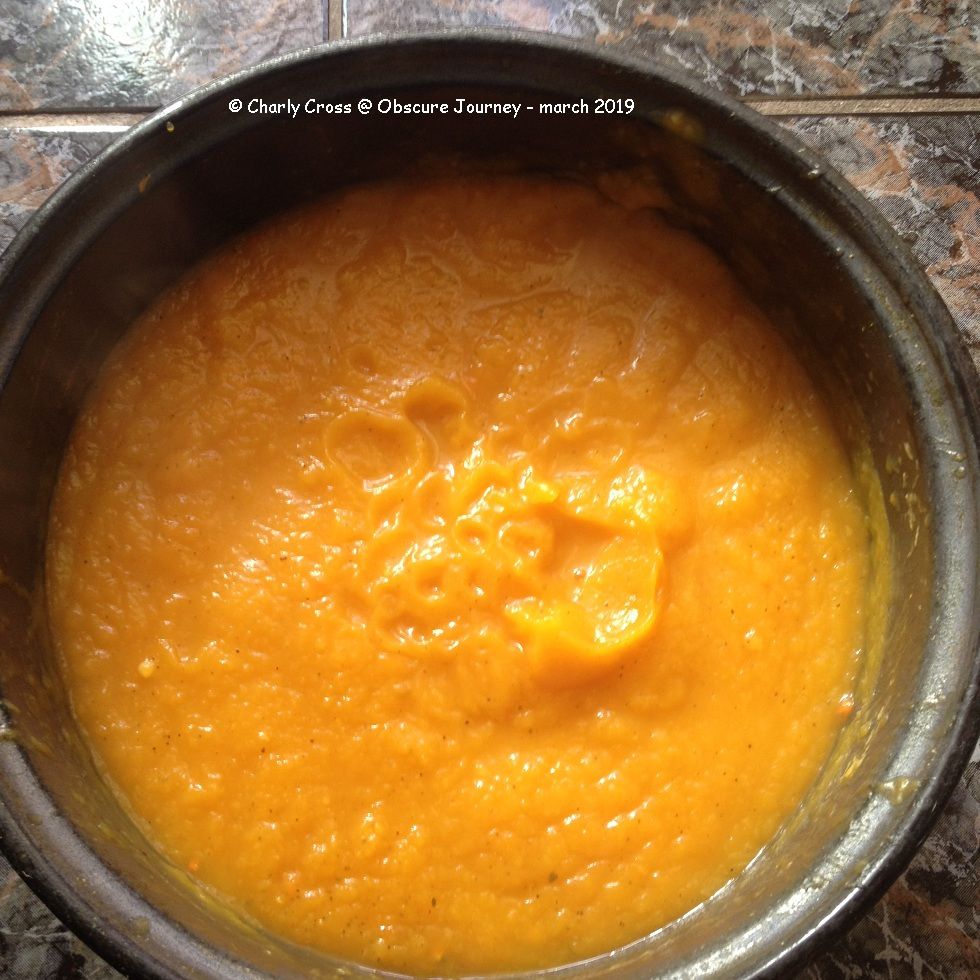
Pumpkin soup -vegan!

Publié le par Charly C.

Is it Halloween? No, it's the lent before Pascha (or Easter, depending on who you're asking), and pumpkin soup is a vegan dish. We're supposed to eat vegan dishes during lent. 

It's also one of the easiest dishes I came across! And honestly, i have no idea why I waited for so long to make it! No, I do know why: I thought it's sweet, since I associate pumpkin with the pie. I was wrong, or at least this soup didn't turn out sweet. 

INGREDIENTS:

  • pumpkin
  • carrots
  • salt
  • powder black pepper
  • water (of course)
  • the tool to mash potatoes (in this case, pumpkin)

METHOD:

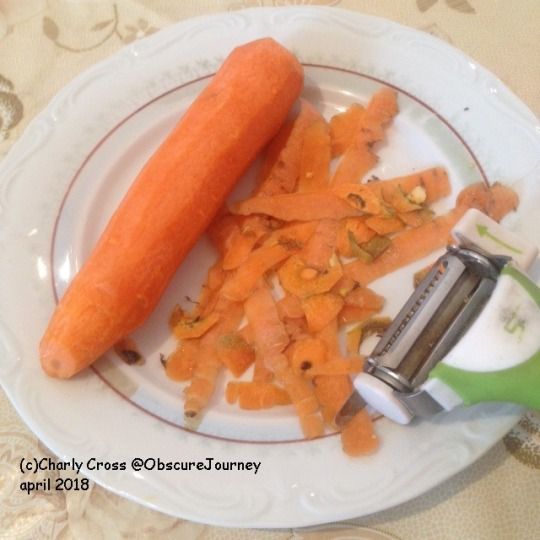
You need to peel the carrots and dice them. 

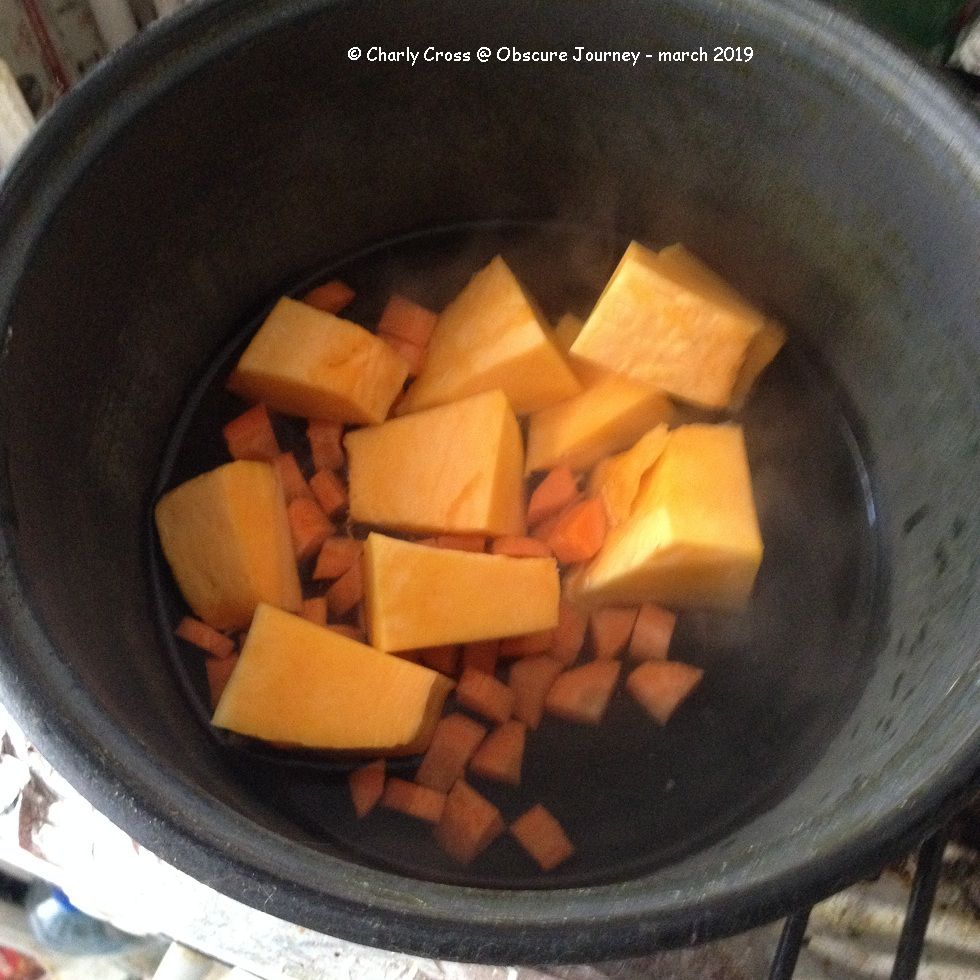
Throw the carrot cubes in a large enough pot, with water and salt. Place the pot on fire. Carrots cook slower than many other vegetables, hence it's ok to have them on the fire for a little longer.

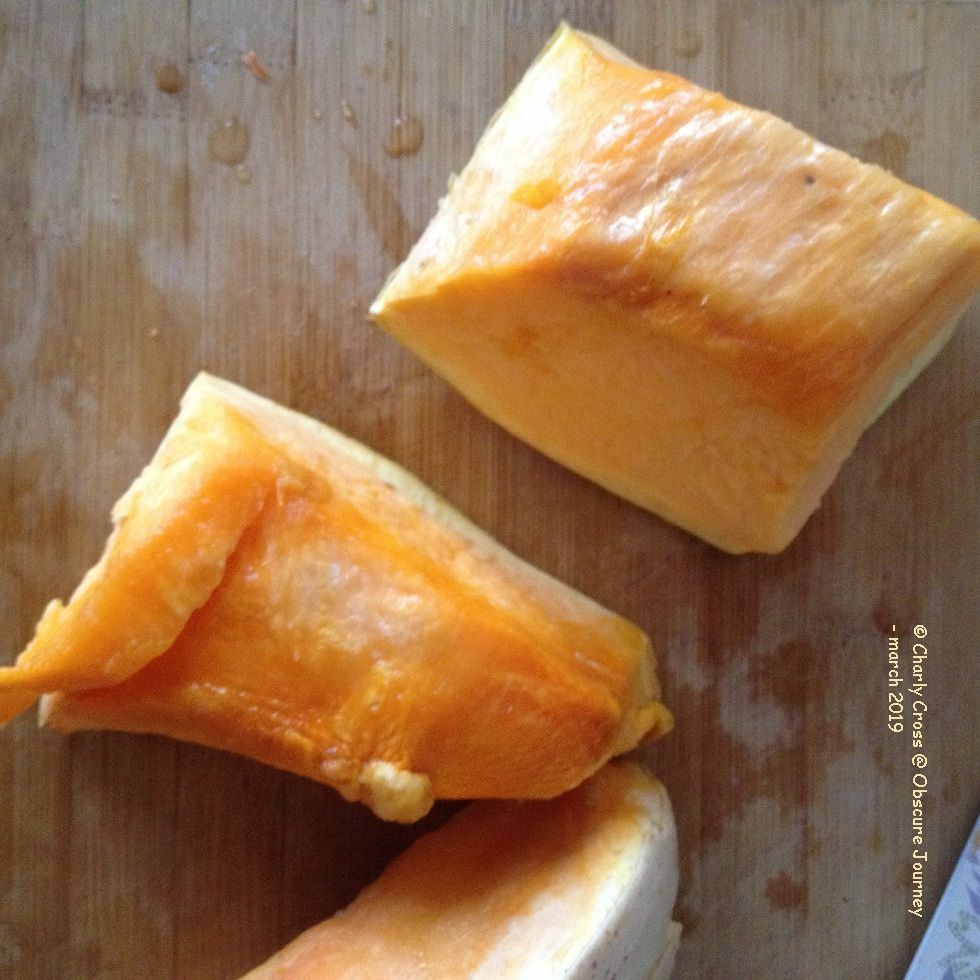
Cut the pumpkin in smaller pieces, and remove the skin. I used my knife for this part. You might want to cut the pieces even smaller, to help with the cooking time.

Throw your smaller pumpkin pieces into the pot as well. Hopefully you can tell the pumpkin pieces in the pot are smaller than on the cutting board.

Turn the heat up, and make the whole think boil for some 20 minutes. You might want to adjust the time, depending on the quantity. You have to make sure the pumpkin is cooked. It has to be soft when you poke it with a fork.

Now you want to take the tool you use for mashing potatoes, and use it to mash the boiled carrots and pumpkin. 

When you're done, you might want to add more salt, and some pepper. You can serve hot or cold.

Bon appetit!

© Charly Cross 2013 - present. All rights reserved.

Voir les commentaires

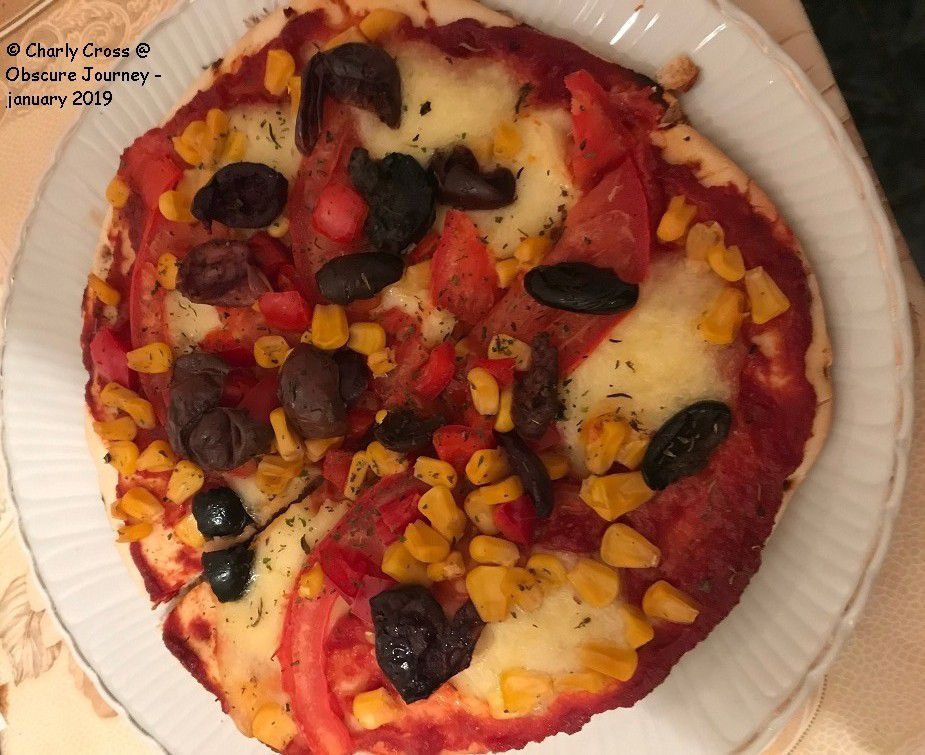
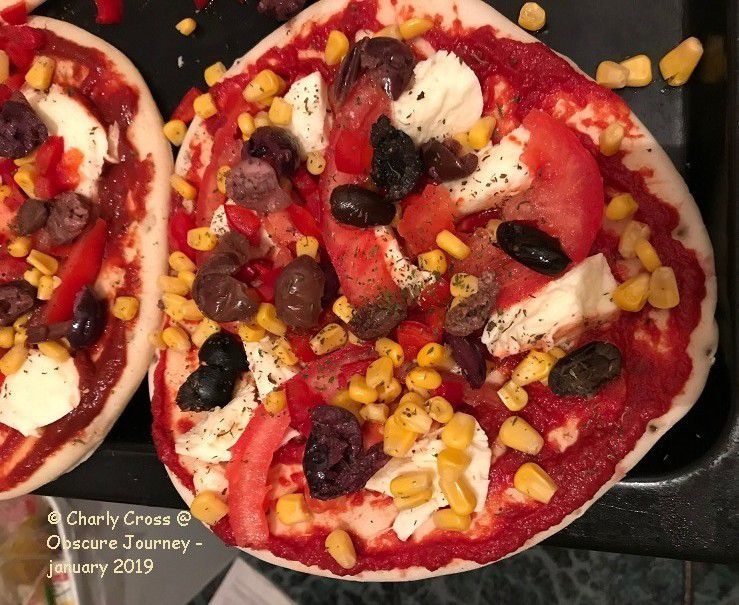
Homemade vegetarian pizza -recipe

Publié le par Charly C.

Hello all~~

I have no idea who doesn't like pizza. But there are people out there that have dietary restrictions, and so ordering pizza can be difficult. For us, it is a little overpriced, depending on where you oder it from and it's not always good either. 

A's mom started making pizza at home, and it's a really good one too. spicy, with lots of ingredients, and several of them. one is big enough to fill you up, especially if you don't eat a crazy amount of food at once. But A's mom moved out of city, and it's difficult or us to go there to get pizza if we were to ask her to make some. Also getting the ingredients is difficult for A's parents because they don't own a car, so they have to either call a cab (it can get expensive) or rely on the public transportation that is not always reliable. 


Long story short, we decided to make our own pizza. A asked for the recipe, and she said she's going to make it. I said "fine" because I think there's a trick to making pizza that I'm not aware of. 

INGREDIENTS:

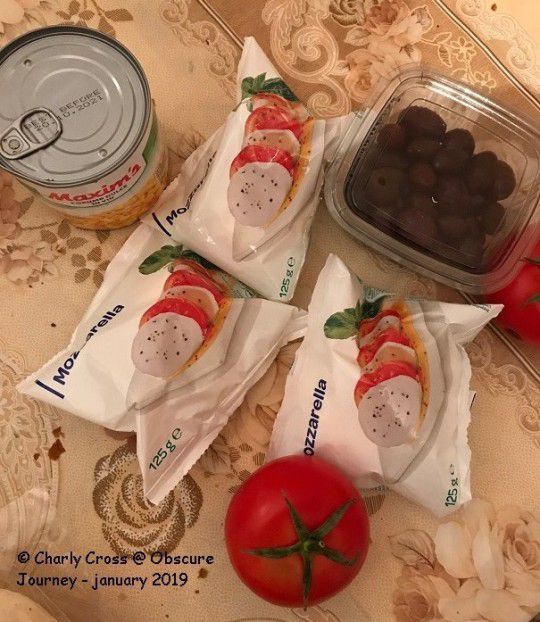
  • pizza dough -or base, or whatever you want to call it. We can find it already made in stores over here. At Carrefour it's really cheap too. we got 2 packs, with 2 pizza dough in each.
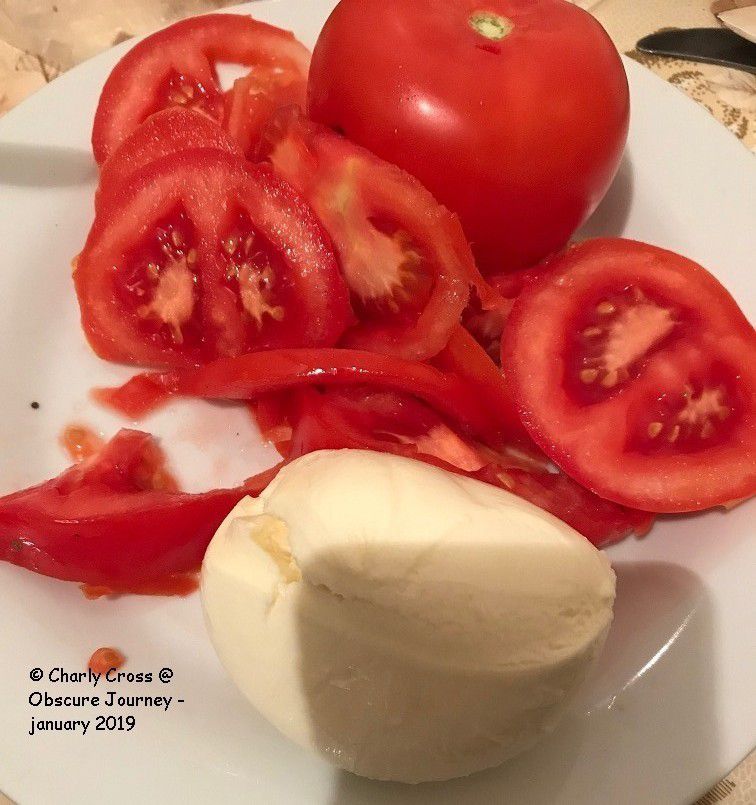
  • 2-3 medium tomatoes 
  • mozarella cheese - ALL the cheese you want or like. make sure it melts, like mozarella cheese does.  
  • 200 grams olives - get the pitted ones or the already sliced ones, you'll save time. 
  • mushrooms - as much as you want, i guess. The pizza in these pictures didn't have mushrooms. :(
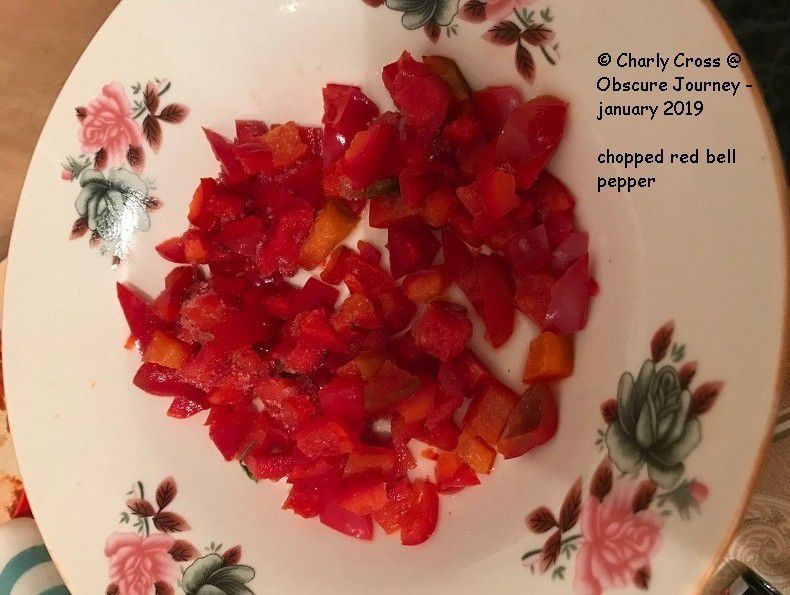
  • 1 bell pepper - red would be best
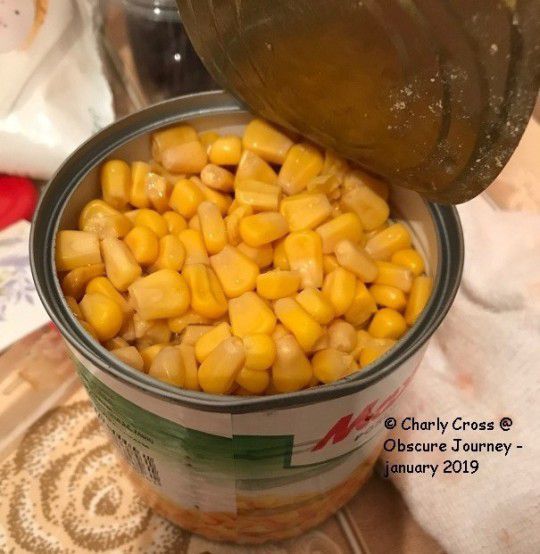
  • corn - we like corn on the pizza. 
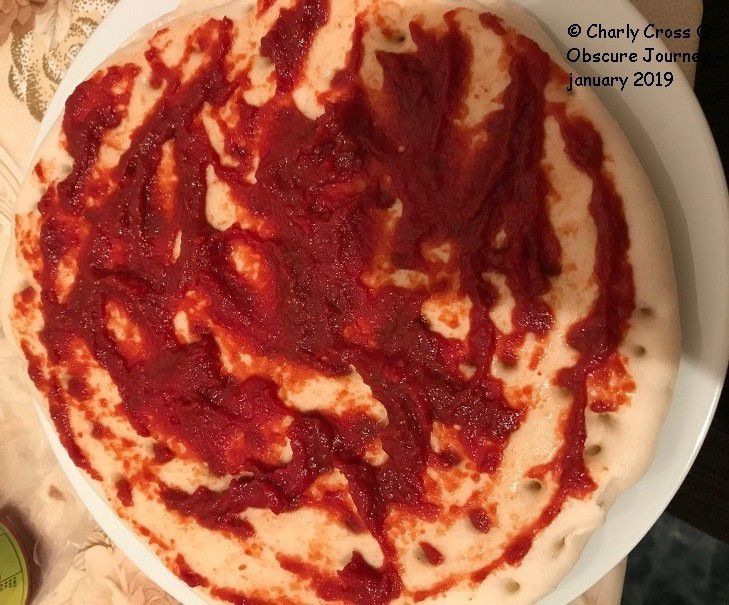
  • tomato sauce - you can use pizza sauce, but regular tomato sauce is fine too
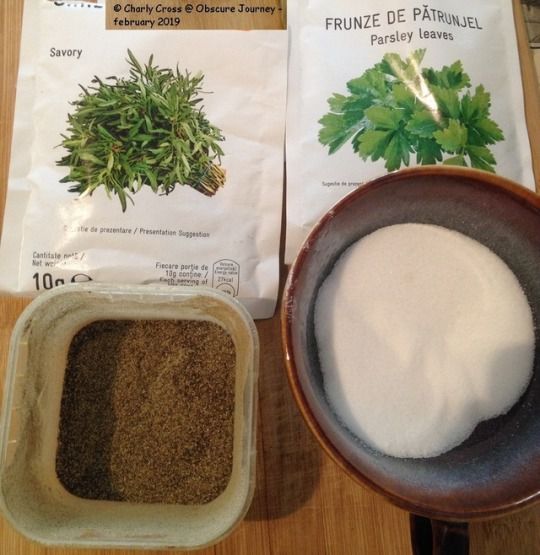
  • aromatic herbs -basil, thyme, parsley, whatever you like
  • some ground black pepper
  • some salt
Homemade vegetarian pizza -recipe

NOTES:

You should know there's no set amount of anything when it comes to the ingredients. A just adds "as much as it fits on the pizza dough."

If you're eating meat, you can add salami, sausages,maybe bacon.  Basically any type of meat you like. A says it's a "trial and error" until you find the balance you like.  Of course you can replace some of the ingredients with others, but the pizza made with these ones was by far the best. 

METHOD:

  • Spread the tomato sauce on the pizza dough.
  • Sprinkle with the condiments - or the aromatic herbs you chose.
  • Add cheese. The more the merrier. ;) It's better to slice it before putting it on the pizza
  • Then add everything else. Make sure to slice the tomatoes, mushrooms and anything that is either too big or has a shape preventing it from staying put on the pizza. Chopped also works.
  • Add more condiments on top. 
  • Bake for 15 minutes, on a really high heat setting, on baking paper. Our oven has a special "pizza" setting, and anymore than 15 minutes in the oven can burn it. NOBODY likes burnt pizza. 

Now you can enjoy it straight from the oven, though leaving it for the next day is perfectly acceptable too. 

Bon appetit~~

© Charly Cross 2013 - present. All rights reserved.

Voir les commentaires

1 2 3 4 > >>